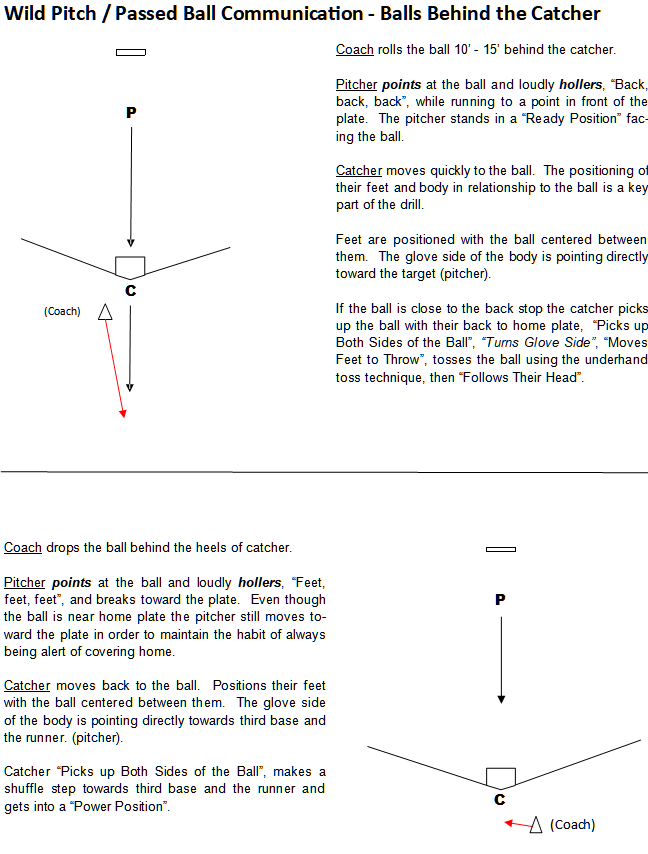
— Baseball is a Game of Movement —
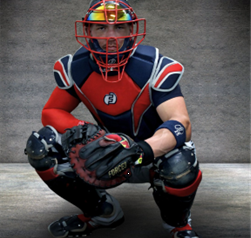
CATCHER

The catcher's defensive position is in front of Home Plate. The Catcher, squatting behind Home Plate, is not in their ‘position’; that is where a catcher catches pitches. A catcher plays defense in front of Home Plate. We call Home Plate ‘Fourth Base’ and call the Catcher the ‘Fourth Baseman’.
Catcher Communication Responsibilities
Call out number of OUTS and location of RUNNERS before each new batter steps up to the plate. This keeps all players in the field engaged.
After the ball is put into play: holler, in a loud voice, to which base the ball is to be thrown (Infielders ‘Echo’ the call on balls in the outfield). If there is no reasonable chance to record an out at a base, the Fourth Baseman hollers, “Eat It, Run It In!”.
Communication on Cut-Relay Plays to Home Plate.
Stance
Fundamentals
Heels a couple inches outside of hips
Toes pointed slightly out (throwing hand foot may turn out a bit more)
Legs relaxed, allowing butt to sit low near heel level
Objective
Catcher is balanced in their stance.
Check: a catcher needs to be able to comfortably rock side to side 4”-6” while in their stance
DRILLS
Stand and Squat
Catcher sets the width and positioning of their feet while standing. Squats down for fives seconds, then stands up. This is repeated 10x. While in the process of standing and squatting, the catcher adjusts their foot position, looking for what is most comfortable for them. The repetition of being in a squatting positions conditions their leg muscles and joints. A week of daily work is needed for a young catcher’s body to find (and become comfortable) in a squatting position that works best for them.
Rock Side to Side
While in their squatting position, the catcher rocks side to side a few times. This action, in combination with the Stand and Squat activity, builds leg strength while helping the player to find the foot position in their stance that works best for them.
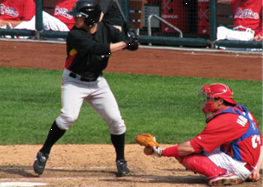
Relationship to the batter: with arm fully extended, the glove should be no more than a couple inches from the batter’s back foot. Many youth catchers sit too far back from the batter. Getting hit by a swinging bat is not something a kid wants to experience. Initially they may be a bit apprehensive setting up closer to the batter.
Solution: Put your catcher in their squat. Stand as a batter, so their relationship to your stance is correct. Make a few slow swings. They, and you possibly, will see that they are safe at that depth. Show them pictures of where MLB catchers set up behind batters.
Benefits of a catcher positioned closer to the batter:
Reduces the distance the pitcher has to throw
Fewer bounced pitches; reducing the chances of a pitch getting past the catcher
Pitches reach the batter lower in the strike zone
Catcher is closer to the field of play, the bases and base runners; fielding and throwing is simplified
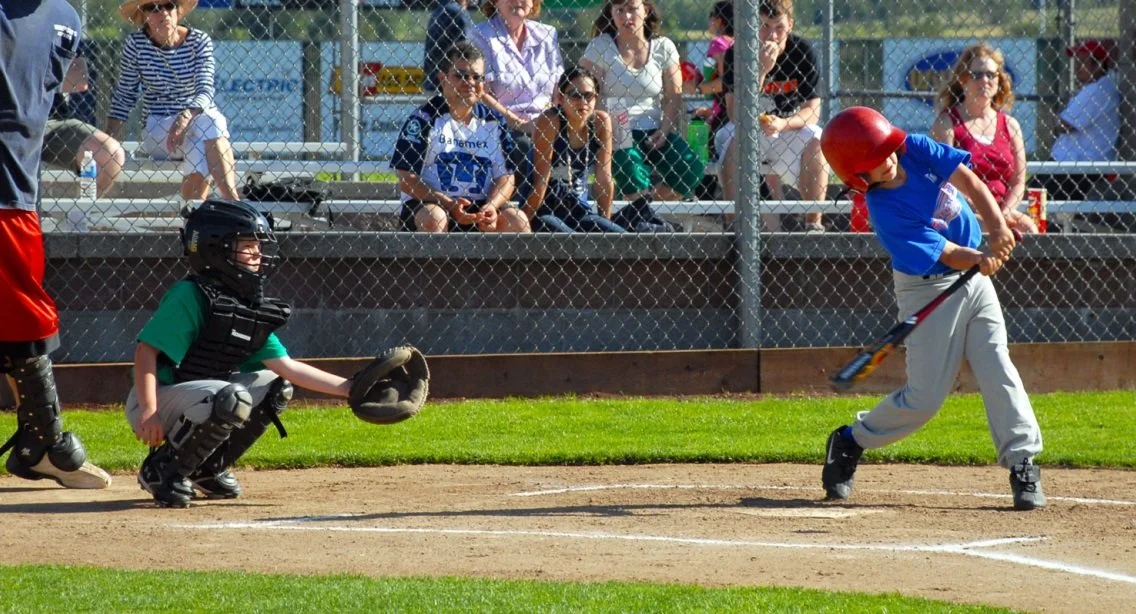
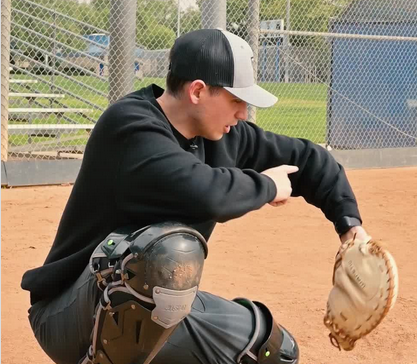
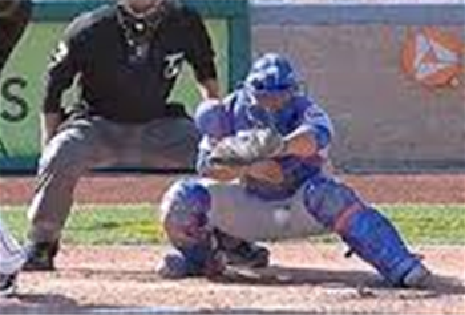
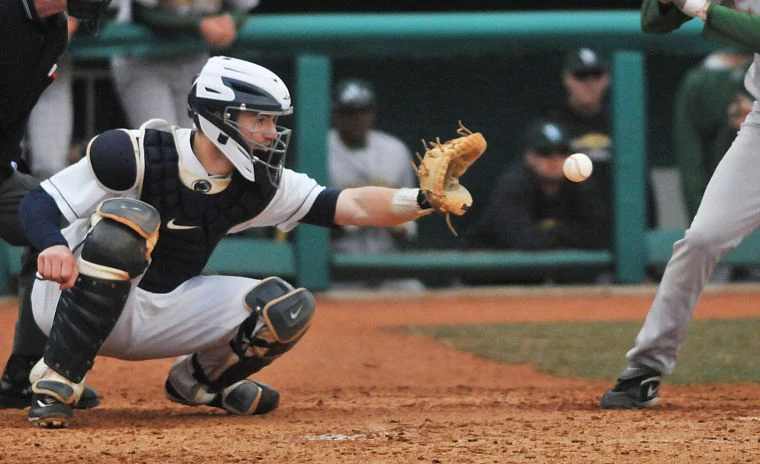
Typical Youth Catcher:
Feet are too close together, resulting in poor balance and limited mobility.
This catcher could be set up 6 Feet closer to the batter. We talk about the number of pitches kids can safely throw. Are we considering How Far they are throwing? A catcher set up with a correct relationship with the batter relieves a massive amount of physical stress on a pitcher.
Furthermore, with a catcher set up closer to the batter (and pitcher) the psychological boost to a pitcher (of seeing the catcher a much shorter distance away) is huge.
Question: How many pitches bounce between where this catcher Should be set up and the point where they are set up in this picture?
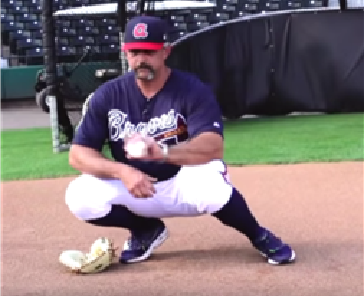
Receiving
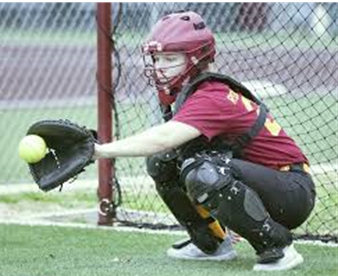
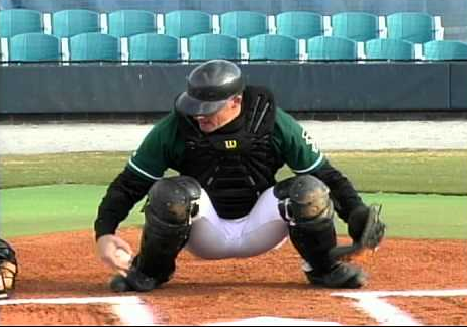
Elbow is above the catcher’s knees. Elbow is pointing out (horizontal); this allows the glove arm to move freely and not get tied up between the catcher’s knees. Thumb is pointing down. (on a high pitch the glove fingers point upward somewhat).
This picture also illustrates the arm and glove position when receiving low pitches in the middle of the strike zone. …the Elbow remains up and pointing horizontally.
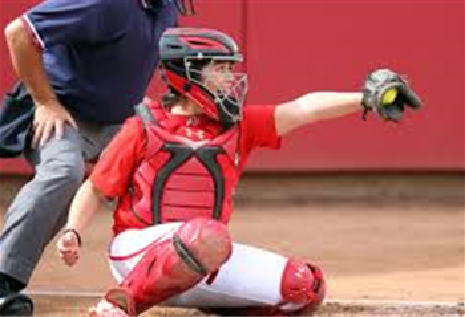
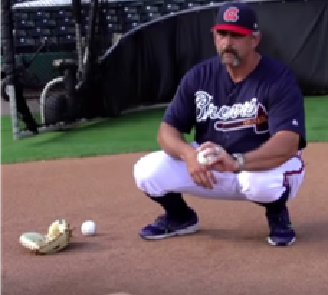
Receiving a Pitch on the Glove Side
When moving the glove to pitches located on the edges of the strike zone, the elbow moves along an arc that is located above and outside the knees. Maintaining the elbow in this arc is particularly important on pitches to the catcher’s Glove Side. Note in this picture that the Elbow is Outside the catcher’s knee. This movement results in the catcher’s thumb pointing horizontally or upward.
DRILL
While in their squat, the catcher moves their glove along an arc, back and forth slowly, from one side of the strike zone to the other. The primay objective is training the glove elbow to stay within this arc throughout the drill action. Initially, this is challenging for a young player. Executing this action requires shoulder strength. Doing the drill increases shoulder strength and coordination.
Move back and forth along the arc three times. Rest, then repeat the drill 3-5x. Working at this, daily, for a couple of weeks results in the catcher developing the skill of maintaining proper arm (Elbow) position when catching pitches in all locations.
Stick the Pitch
When receiving a pitch, we want the to maintain the arm position and glove location when the ball is caught. This gives the umpire a better look at the pitch location. Enhances the ‘appearance‘ the pitch. Note: Do not Stick an pitch clearly out of the zone.
How long does the catcher hold their glove position after catching the pitch? As long as it takes to say the phrase, “Look at that”.
Sticking the pitch not only helps the umpire see the pitch location, when sticking the pitch the (young) catcher is more focused on the catch, since they are going to hold their glove position for a moment after receiving the ball.
Collapse the Wrist
When the ball is impacting the glove, the catcher ‘gives’ at the wrist joint (not the elbow). This softens the impact of the ball hitting the glove, which increases the percentage of balls caught. Also, when collapsing the wrist, the glove tilts towards the strike zone, adding to the appearance of the pitch being a strike.
DRILL
Coach stands approximately 20’ from the catcher, tells them which side of the strike zone they will toss the ball. Coach tosses the ball firm and level using an Underhand Toss technique. The toss to the catcher will be consistently more accurate tossing underhand than overhand
10x each side | Repeat, if time allows
Shift to Receive
Earlier, when discussing the stance, we talked about the need for a catcher to be balanced and able to shift side to side in their stance. When receiving pitches on the edges of Home Plate, a catcher wants to shift their body to the side of the plate the pitch is headed, prior to the ball reaching the plate. The shift is only a few inches. However, this slight shift puts the ball more to the center of the body. On a pitch that is outside, but near, the strike zone, the shift of the body gives the appearance that the ball crossed the plate. Mastering this body shift when catching pitches near the edges of the strike zone can increase the number of strike calls in favor of the pitcher during a game.
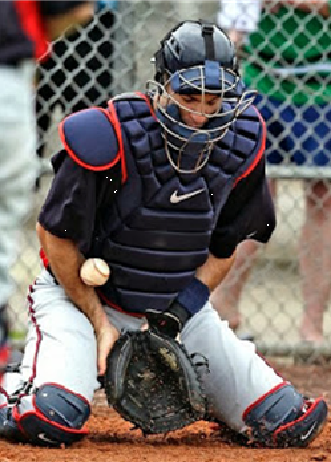
Blocking
Blocking Position: a catcher wants to remain as ‘big’ as possible when blocking the ball:
Knees wide apart
Butt between heels
Glove and throwing hand between knees
1. Fingers of the glove pressed slightly into the ground; slightly in front of the palm of the hand
2. Throwing hand behind glove
Body bent slightly forward at the waist, but remaining vertical and ‘tall’
Elbows outside the body/torso
Chin tucked to the chest; mask facing down
Notes:
In this fundamental blocking position, the catcher makes a ‘C’ shape with the front of their body.
When landing in a blocking position, the catcher wants their body/muscles to relax as much as possible. When the ball hits a relaxed body it ‘dies’ and lands near the catcher. When the ball hits a tense body, it can bounce far away from the catcher. Developing the ability to relax the body when reaching the blocking position takes some time and repetition.
When blocking, we ell our catchers to ‘catch the ball with your body’. this mindset is the first step to a catcher resisting the urge to lift their glove off the ground in an attempt to catch the ball off the bounce. When doing this, the catcher opens of the space between their legs for the ball to go through. This also takes the body out of position, which often leads to the ball bouncing off to the side, instead of in front of the catcher.
Practice Space
It is not necessary to practice blocking skills at home plate. Foul ground on the first or third base side, or even in the outfield grass, works fine. Draw a plate in the dirt, use a throw down base or something else to represent home plate. In a team practice setting, being comfortable working on catcher skills anywhere on the field allows other members of the team to address their drill needs while the catcher(s) gets in their work. Our objective when structuring practice is keeping every player busy developing skills at all times.
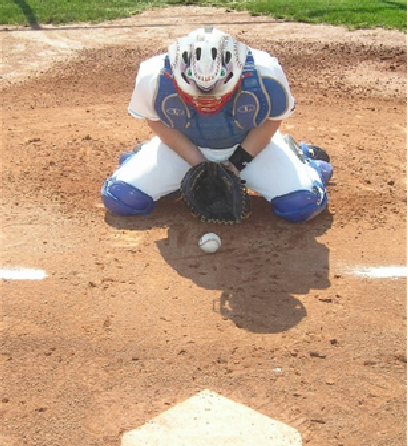
Fundamental Blocking Position
Block the Ball with the Body
The drills below are done without a ball. Reasons:
Our ability to consistently, and accurately, bounce a ball in the right spot is low.
Getting the players the massive reps needed to master this skill will unnecessarily beat up their bodies
Players can focus on the blocking action. We first need to develop the movement of the skill, before introducing a ball
Practicing without a ball enables the players to work in grass (or other soft surface) providing them will a softer landing spot than dirt or artificial turf provides
Enables us, as coaches, to work with catchers anywhere on the practice field. Often the infield/Home plate area are needed for drills involving other players on the team
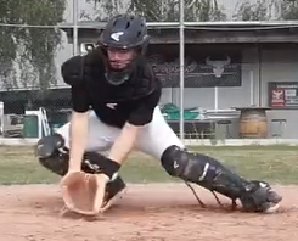
Blocking Balls in Front
Drill x5-8
From the stance, the catcher simply rocks forward onto their knees, landing in a good blocking position. Have the catcher experiment with giving a thrust using their feet, so to land a few inches further forward. The closer the catcher is to the bounce, the less room for an off-line bounce to get past them.
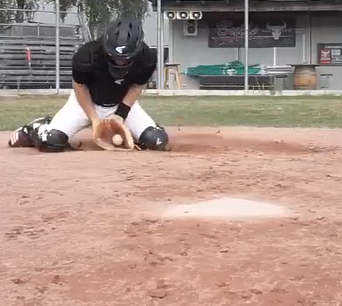
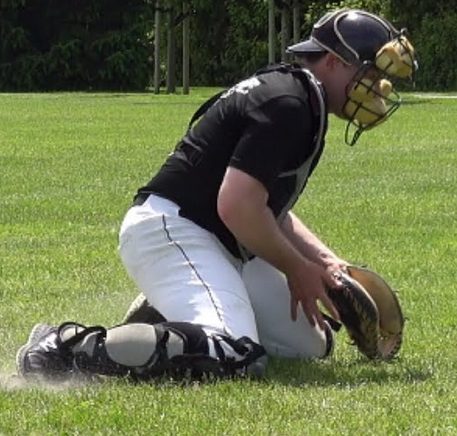
Blocking Balls to the Side
First, communicate to the catcher(s) that we want them to develop the ability to block balls that are up to 8” wide of home plate (this means getting the center of their torso 8” wide of the plate). We do not expect them to block balls that are more than 8” wide of the plate (though it would be great if they did). This is important for two reasons:
Gives them a realistic goal (for a kid), and focus, for their drill work
Relieves pressure of unrealistically high expectations (from the coach and of themselves)
Drill Objectives
Develop agility and quickness through repetition.
Consistently finishing in a sound blocking position with the body angled slightly in towards home plate - 10-15 degrees
Drill x10 each side | Repeat
THE SKILL: The blocking action involves a thrust of the hips, to the side, past the foot. The feet and body will follow automatically.
Work exclusively to one side, then work to the other side. We want a player to execute the same action (to their left or right) repeatedly to train that single movement.
First couple of workouts make the hip action the exclusive focus; that is the key aspect to the blocking action. Then we can add a focus of pushing with the off-side foot to assist the lateral hip thrust.
The action of leading with the hips is new, and possibly, unknown by most kids. It is important that they first develop a feel for the hips leading the action of moving the body laterally.
Note: when working with a player struggling to lead with their hips, have them rock side to side in their Stance (this was the first skill be introduced on Day 1) to gain a sense of the lateral movement of the hips. The skill of rocking side to side is the foundation of the lateral hip thrust.
Practice blocking movements in grass; easier on the body
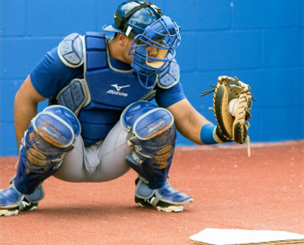
Target
Youth catchers do not have the body (shoulder) strength that teens, college, pro players possess. We want to take this into consideration when training our young catchers. A youth catcher can give a ‘target’ with their elbows on their knees and the back side of the glove facing the pitcher. NOTE: there is nothing magical about showing the pitcher the palm side of the glove when giving a target. The back side of the glove provides as large of a target as the palm side.
When presenting a target in this fashion, we limit the amount of time a young catcher’s glove-shoulder must support the weight of the arm and glove.
DRILL
Catcher sets up in their stance with elbows resting on their knees. A coach, standing ~20'‘ away, goes through the pitching motion, stopping short of throwing the ball. When the catcher sees the pitcher’s throwing hand coming up above their shoulder/head, the catcher slowly (fluidly), and in a controlled manner, lifts their glove-elbow a few inches above their knee level, while extending their glove arm, presenting the glove towards the pitcher.
The objective is the catcher developing the timing of presentation of their glove just prior to the pitch being delivered. Mastery of this action (and its timing) results in the catcher’s glove-shoulder needing to support the Glove and Arm for less than a second. The energy saved is dedicated to receiving, blocking, and throwing; while maintaining their stamina for multiple innings or an entire game.
Repeat 3x. Allow the catcher(s) to stand up to stretch out their legs. Then do a few more sets of three repetitions. Time required: 5 minutes or less.
This drill can be done with all your catchers at the same time.