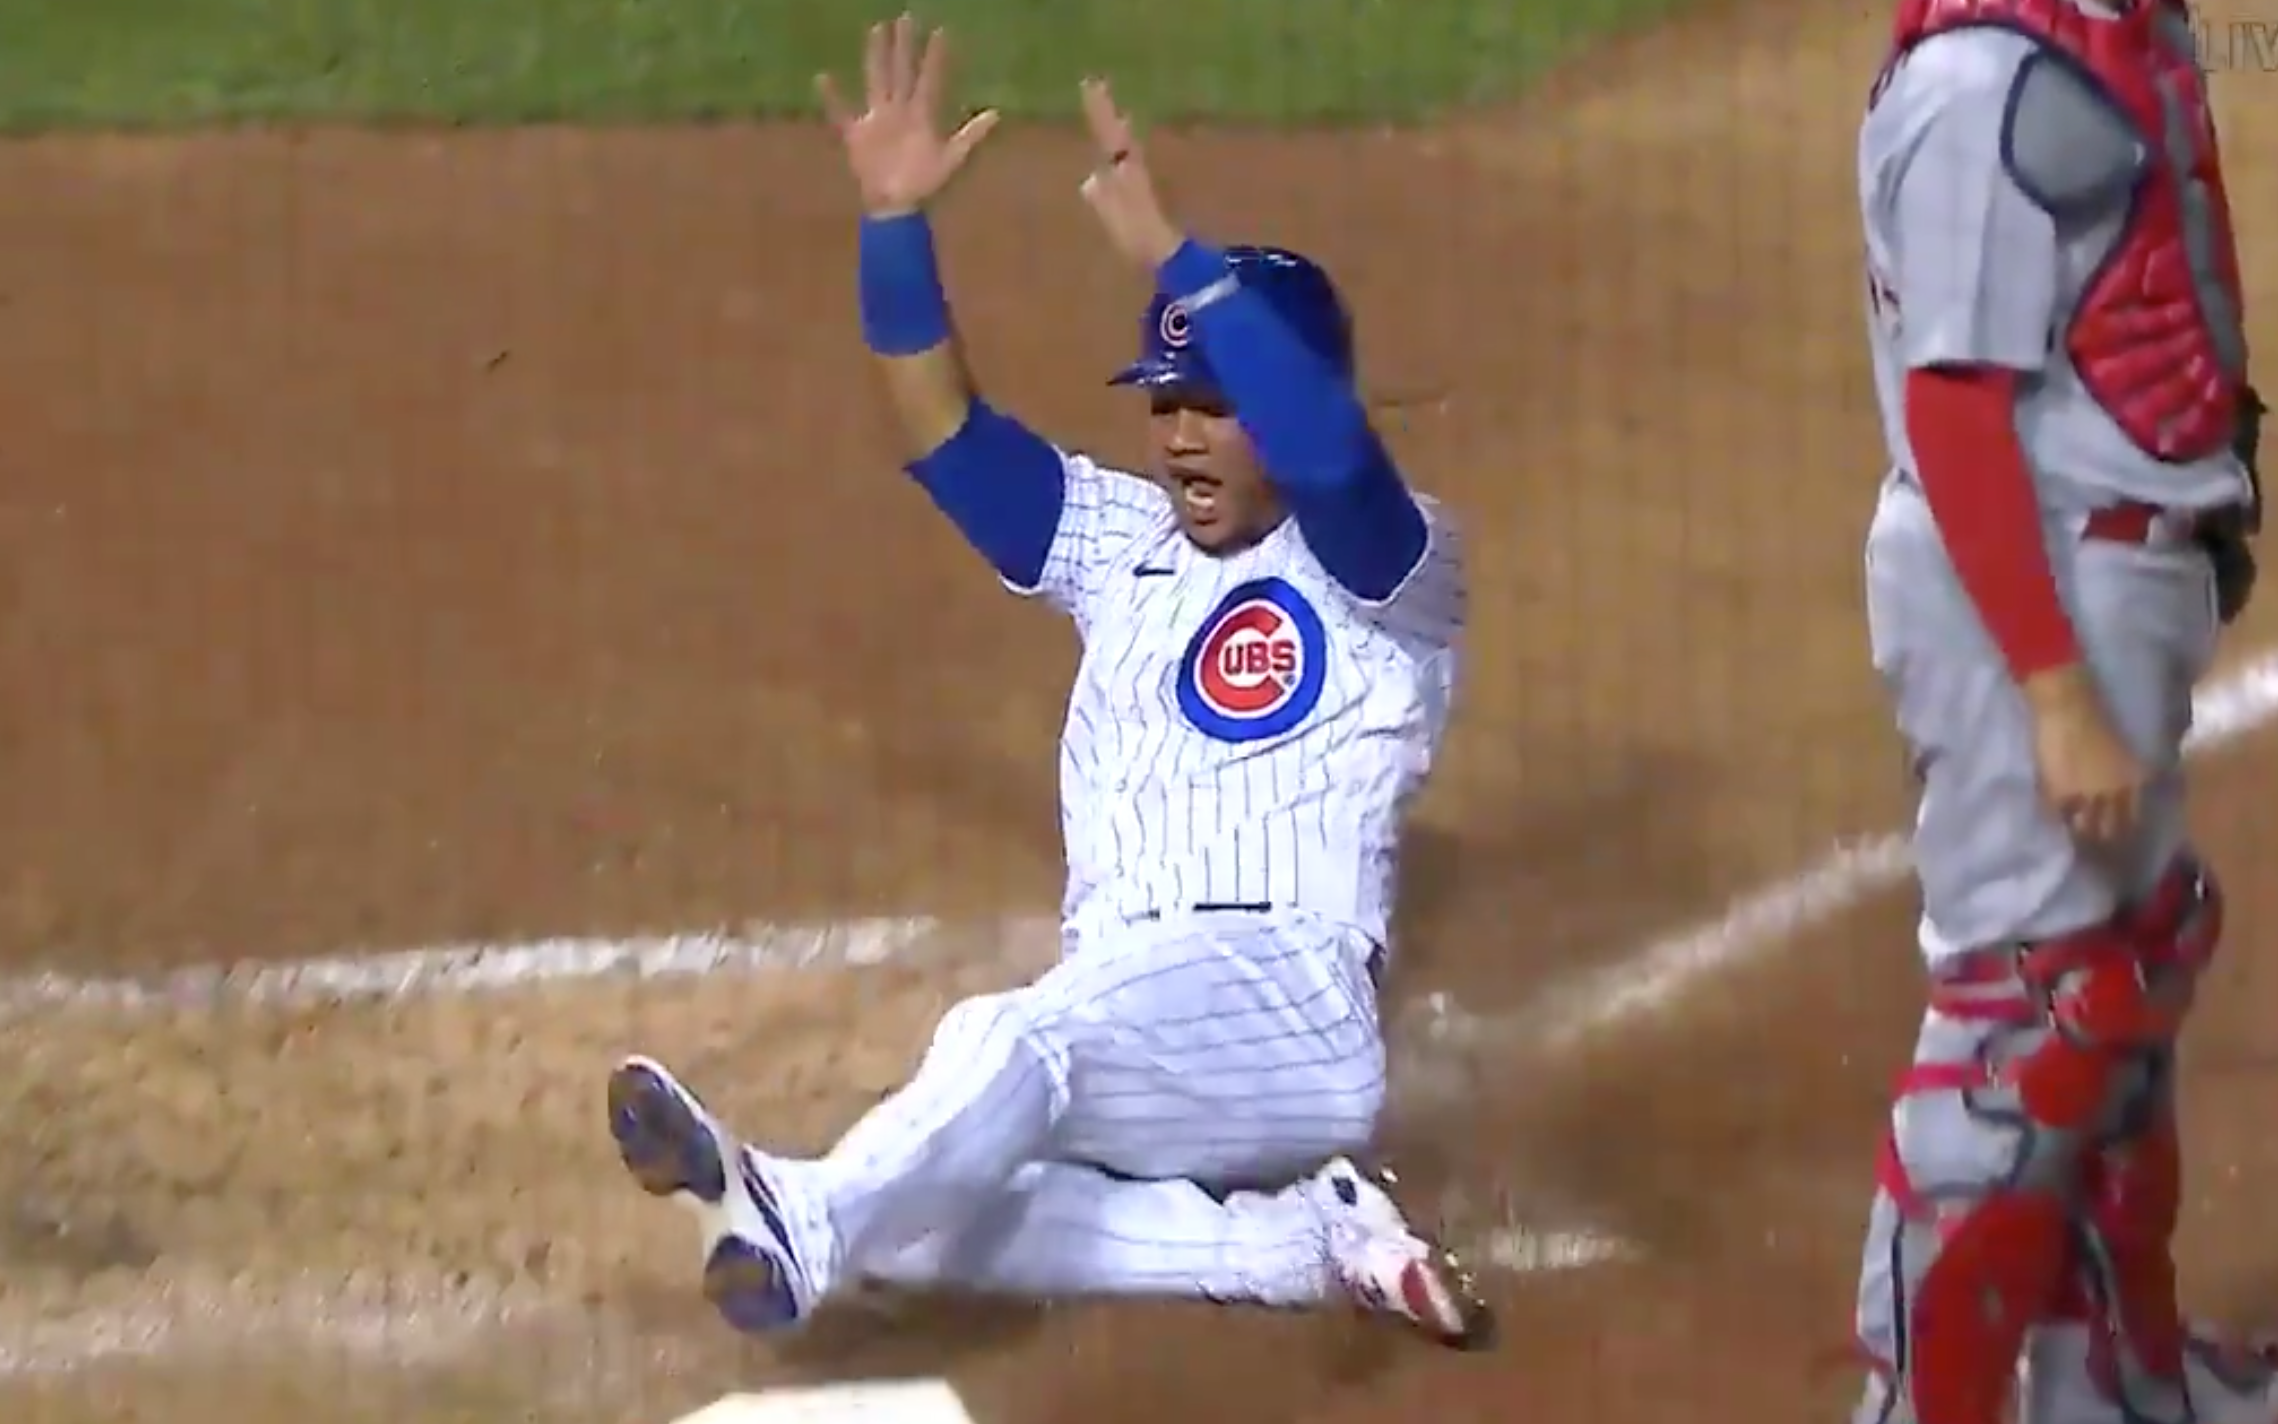
The Second Baseman Is Not The Relay Player ...their role is to 'get the ball back to the infield'

Outfield Throwing SB Player.png

Relays To Home Are Run Usually Run Incorrectly

We are coaching our team at the local playfield.  A runner on second; our team holding a two-run lead.  The batter slugs a base hit over the second baseman’s head.  The right fielder hustles over to the ball while the second baseman moves into the outfield. 

The runner is being waved home.   Our right fielder picks up the ball and makes the 30’ foot throw to the second baseman.  The second baseman turns and unleashes a 100’ throw toward home as the base runner barrels down the line.  The high arcing throw veers offline; runner scores.

The pitcher is standing next to the rubber, watching, hoping, praying that the runner will be out at home.  All the while the batter (and potential tying run) is skipping on to second base.  The realization sets in on the pitcher that not only is the tying run in scoring position, but a potential force out at second against the next batter is lost.


What is the Role of the Second Baseman?

It is important for us to recognize that the second baseman (or shortstop) is not the cut-relay player on base hits to the outfield.   The role of the middle infielders in this situation is to ‘Get the Ball Back to the Infield’ when the outfielder has no play on a runner.

The cut-relay player in this situation, and at all levels of baseball and softball, is positioned just inside the baselines.  On the larger diamond the Cut-Relay player is the first baseman or third baseman.  On the smaller diamond the cut-relay player is the pitcher.


Why is the Pitcher the Cut-Relay Player on the Small Diamond?

Cut-Relay Play to Home - Ball Hit to Left - Responsibilities of All Positions.png

Most smaller diamonds have little room between home plate and the backstop 

On a larger playing field, which has the backstop quite a way behind home plate, the pitcher’s responsibility is back-up on throws to home.  This is not necessary in the game played on the smaller diamond.


The pitcher is one of the better athletes on the field

At this level of play it makes sense to get the ball in the hands of one of our best athletes as often as possible. 


Simplification

Making the pitcher the cut-relay player, for all throws to home plate simplifies things for the players and coaches. 

(In the game played on the larger diamond the first baseman is the cut-relay player on balls hit to right and center fields, while the third baseman is the cut-relay man on balls hit to left field.  There is an either-or decision to be made; opens the door for a mental mistake.)

Getting the Ball in to the Pitcher  - pitcher backing up Third Base.png


Get the Ball Back to the Infield

Identifying the difference between a ‘Cut-Relay’ play and a ‘Get the ball back to the infield’ situation:

The runner from second stops at third or is clearly going to score.  There is no reason to risk a throw.  Now we have a situation where we need to get the ball back into the infield.  As simple as this sounds, we need to educate our players to recognize the situation and ‘execute’ getting the ball back to the pitcher, securely.  Below is a diagram of a drill to train this ‘simple’ play.

  1. First, instruct the second baseman (or shortstop) to run further out towards the outfielder (within 15’-20’). 

  2. Next, instruct the outfielder to underhand toss the ball to the middle infielder (or literally hand it to them).

  3. Finally, the middle infielder quickly turns and runs the ball back into the infield (while maintaining constant attention on the base runner(s) ).

If the outfielder has a throw, the middle infielder gets out of their way.  Then turns and looks for where they are needed; cover a Base or Back-up (they are no longer ‘playing the Ball’).  - see Three Individual Responsibilities on Defense


What Does It Take To Get To The LLWS? …insight from a coach who has been there

Robley Corsi, who I am fortunate to call a friend, took Pacific Little League (suburban Seattle) to the Little League Northwest Regional twice and advanced to the Little League World Series in 2014.  Click the video link below under the CHARACTERISTICS heading.


LLWS Pacific.png

Recognizing These Are Just Kids

Robley and I first met a couple of years before he took his team to Williamsport.  As we shared philosophies and our approach to teaching, I sensed immediately his unique combination of solid baseball knowledge, an understanding of how to connect with kids and his enthusiasm for helping kids learn and grow, and doing so in a fun and positive atmosphere.

Our discussions over the ensuing years usually centered around ideas such as creating a positive team culture and injecting encouragement into all aspects of teaching and interacting with young ballplayers.  We talked a lot about keeping instruction simple, while emphasizing the value of repetition and not investing too time on ‘advanced’ instruction.  My experience, at all levels of baseball, had been that the game is often over-coached.  Hearing Robley’s perspective was refreshing. 

A point that Robley tied in with almost everything he shared with me was that these are kids who, primarily, want to go to the park and have fun playing baseball with their buddies.


The Williamsport Experience

When I spoke to Robley after he and the Pacific Little League kids returned from Williamsport, I asked him about the interaction between the competing coaching staffs…..I was shocked by what I heard…and pleasantly surprised.

We constantly hear about overly competitive parents and coaches in youth sports.  Given that these were the top eight programs in the country, I assumed many found their way to Williamsport under the guidance of drill sergeant coaches pushing the kids to their limits.  I thought Robley would tell me his positive and encouraging approach was an anomaly.

It turns out that when the coaches compared notes on their journey to Williamsport the formula was pretty much the same for everyone.  The coaches recognized that these were just kids, and just because they may have better than average ability, they still had doubts, fragile emotions and needed to be constantly reassured they could work through the challenges they faced.  

When the discussions got around to how they taught baseball skills and how to play the game, the consistent theme was a belief in focusing on the basics, getting the kids a lot of reps and keeping the instruction simple.  And all the coaches emphasized how ‘keeping the game fun’, was a key component in their success.


Characteristics of a LLWS Coach

This VIDEO featuring Robley and Pacific Little League illustrates how a positive and encouraging environment, where the kids truly are the priority, can be the recipe for championship level success. 

The defining moment in the video, in my opinion, is at 1:23.  Robley is in the third base coaching box.  One of the kids on the team he is coaching smokes a ball down the third base line; a sure double.  The other team’s third baseman makes a beautiful backhand play, robbing the batter from Robley’s team, and throws him out at first. 

What is Robley’s reaction?  Pure joy and excitement!  Without hesitation, he is pumping up the third baseman for making the play.  Robley’s first instinct is to acknowledge the great play, it doesn’t matter that the kid is on the other team.  He is taking joy in a kid experiencing and enjoying a big moment.  The chance to make a play like that does not come up often ...to complete the play is a big deal to a young ballplayer.

What about the batter from the team Robley was coaching who was robbed of the double?   Robley’s comments to that batter aren’t shown in the video.  However, I suspect the conversation went pretty much like this… 

“Hey, you Smoked that ball!!!   You picked a good pitch and made a great swing.  The third baseman made the play of the year on you.  That’s baseball.  You can only control so much.  That was a great at-bat.  Grab your glove, set your mind on playing defense and before long you’ll have another shot at the plate.”


Takeaways

Coaching kids starts with being genuine.  Kids don’t expect their Little League Coach to be a baseball guru.  They understand that, in most cases, coaches are just the dad or mom of one of their friends on the team. (I recall when Cody Webster and Kirkland National Little League -another suburban Seattle league- won the Little League World Series in 1982.  When their coach was asked about his baseball background, his response was ‘I learned from reading a book on coaching baseball’.  Yes, he was just a dad from the neighborhood.) 

Players want a coach who maintains some level of communication with them as individuals, shows they care and does their best to help them get better at baseball.  We can best accomplish these things by going about our business being ourselves and not thinking that being a coach means ‘knowing it all’ or putting on some other persona.

Other points to take note of:

Keep Instruction Simple - these players are still just kids; they are far from mastering the skills of the game.  We can easily overwhelm them by constantly teaching more and more new stuff.  Often, we feel that, as coaches, if we aren’t giving them new and deeper instruction, we aren’t doing our job.  Coaching is less about jamming kids with a lot of information and more about guiding them in their development by reinforcing the things we have already taught them.  Kids can attain a pretty good level of success with just the ‘A, B, and C’ of a skill and doing those basic aspects well.  Well-intentioned coaches often give too much information, which can result in player’s development stalling or even regressing.

Repetitions - when we keep instruction simple and organize practices that keep all the kids moving and ‘doing’, they develop and improve faster.  Talk to a coach in higher levels of any sport and a common theme is that repetitions has a greater impact on improvement then feeding an athlete a bunch of information.

Encouragement - baseball (and softball) is a difficult game to play.  Catching, throwing, and fielding a little ball and trying to hit that little round ball with a round bat is not easy.   Mistakes are made each time these young players take the field. Frustration and discouragement are common emotions during the process of learning to play the game.  Constant encouragement and positive reinforcement is vitally important to help kids through the many rough moments they experience on the ball field.

Perspective - give some thought to the idea that the game is about the kids.  Why did we choose to coach what I like to refer to as ‘Neighborhood Baseball’?  This isn’t travel ball or select ball; it’s a bunch of kids who share the same parks, schools and whose parents shop at the same grocery stores.  Our role is to teach them, not just about the game, but about working through struggles and adversity.  When we go into coaching Neighborhood Baseball with the perspective that it’s all about the kids, and doing all we can to make it a positive experience, we set ourselves up to gain the greatest satisfaction from coaching.

Fun - the results of study after study on why kids play sports, ‘having fun’ and ‘being with their friends’ are consistently at the top of the list (maybe do a quick Google search on the subject).  When asked why they quit sports, ‘not having fun’ is at or near the top of the list.  In all that we do, we want to keep in mind why kids chose to play in the first place.  They come out to play because they look forward to it being fun.

Each year only eight US teams and eight international teams make it to Williamsport.  Three million kids play the game.  In the video, we get an inside look at a coach who has taken a team to the Little League World Series.  Who knows, it just may help you get the kids you coach to Williamsport next year.  Most of us however, will not make it to Williamsport, but each of us can take something from this video, apply it to our coaching, and make a positive, life-long impact on the kids we work with. 

Concerned About The Quality Of Your Kid’s Baseball/Softball Coach? …this is what you can do to make things better

Lou Pinella.png

Why Aren’t They Playing Better?

As parents we likely have stuck around and watched a bit of our kids practices.   Hmmmm, not exactly what we expected?  We thought our child’s batting would improve more and that the pitchers would be throwing more strikes.  And, my goodness, what’s the deal with all the mistakes?  Why isn’t the coach doing a better job?  The kids should be playing better, right?

Maybe we haven’t played before and don’t really know the game.  We put our kids into baseball and softball for our kids to learn and get better.  But our child is not improving as much as we expected.  Gosh, they have a coach, isn’t it the coach’s job to teach them skills, teach them how to play the game and have them improving?

Some of us might think to ourselves that we know the game a little bit; played it some in our youth.  We have a few ideas of how the practices could be more productive or how to teach some of the skills a little better.  Maybe we thought about contacting the coach to make a few suggestions? 

Before we go any further, let’s first identify who the coach is.  The coach, in most cases, is a parent just like us.  Their child is playing on the team; the team needs a coach.  Fortunately, that parent volunteered to coach the team.


“Volunteered!”


That is the key word we must keep in mind before we conjure up thoughts of questioning the coaching of the team or our child.  It is important to understand that professional coaches do not suddenly appear in every neighborhood, by the dozens, across the US, Canada and the world each spring. 


They Are Our Neighbors

Those coaches appear from the homes in our neighborhood, they are our neighbors and the parents of our kids’ classmates at school.  They shop at the same grocery store, attend the same church, and walk the same streets as us.  Most of these parents, er ‘coaches’, are not experts in the sport.  They are regular folks volunteering their time, so our kids have an opportunity to play.  Many parents do not understand how lucky the kids are to have a coach at all. 


Most leagues find themselves scrambling each year to fill coaching vacancies right up to the start of practices.


It is important for us to understand this before we think of questioning a coach.  We first need to consider just thanking them for even being there.  Coaching is a big-time commitment.  It’s not just the 90 minutes or 2-hours on the field for practices and being at the games.  The hours put into coaching double when we factor in time invested away from the field.


Off-Field Requirements

These volunteer coaches attend a variety of pre-season meetings, they collect equipment and cart it around for the entire season and, among other things not mentioned here, they prepare for those practices and games.  That preparation time is juggled around managing their other kids who are not members of the team they are coaching.  Some are coaching a second team of a sibling.

Our kids’ coaches must coordinate with a spouse who is likely picking up some extra domestic duties for the coach to fulfill their commitment to the kids on the team - our kids.  Most coaches also sacrifice something in their work life in order to coach.  They have to figure out how to scoot out of work early on some days, not to mention that coaching takes up brain space; it is inevitable that their work production suffers somewhat during the season.

Wow, maybe we really should give our child’s coach a big THANKS! for making the commitment in the first place and forget about the criticisms that have been in our thoughts lately.


Nothing to Fear

The good news is we can impact these things …next year WE can volunteer to coach.  Before that big neon sign in our brain starts flashing, “No Way!” we can rest assured that most anyone who cares about kids can coach youth baseball and softball.  It doesn’t matter how little or how much we know about the game.  It just takes some time, energy and a desire to contribute something positive to the growing up years of the kids in Our neighborhood.  What could be better than spending a half dozen hours a week with our own child and their friends playing in the park?

Don’t worry about not having much knowledge of the game.  It is easy to learn to coach youth baseball and softball.  They are arguably the simplest of the team sports to coach.  There are no fancy Triangle Defenses or West Coast Offenses to master.  The players are positioned pretty much the same as they have been for the past 150 years.  The fundamentals of throwing, batting and fielding are much simpler than it appears and it doesn’t take much to learn to teach these skills.


The Resources You Need Are Right Here*

This website has all the information you need to coach at the 12U level.  Look at the Coaching Guide, Practice Plans, Skill Building Warm-up, Batting Practice and Tee Ball pages on this site.    This information is provided to make coaching a youth baseball or softball something that anyone can do, do well, and have a great time doing it.

The next time we feel a criticism for the ‘Coach’ welling up in our minds let’s remind ourselves that they are just a mom or dad like us.  If we really want things to be different, we need to check with the person in the mirror.  That person is no different than the current coach other than making the commitment of time and energy to get out there and coach.

We need not have anything to fear in taking the job ...except those pesky parents that might bug us because they don’t understand what it’s like to be in the shoes of a youth softball or baseball coach. ;)


* "A parent complimented me on how much his kids are learning due to my ‘extensive baseball knowledge'. Of course most of the finer points have been taken more or less verbatim from Baseball Positive."
- Nick (Parent, Coach & League Board Member) - Toronto 


* “I cannot express my gratitude enough for your efforts in producing such a document and leagues around the country would be wise to adopt your teaching if they wish to teach sound, fun baseball.”
Yours in Baseball,
   -  Sean Cherry. Manager, 2018 Coeur d Alene Little League All-stars, 2018 LLWS Participants


Batting Is Like Jumping …how to generate greater bat speed and power

Batting is Like Jumping.jpg

Note: this article touches on a couple other aspects of the swing beyond the leg action.  Those aspects are not explained in detail.  Each aspect of the swing is addressed in other Baseball Positive articles and videos.  Please let me know in the comments section if this article creates more questions than answers.  I will reply and try to provide some clarification.


The Legs Initiate and Power the Swing

The energy for power and bat speed in the swing is generated in the legs.  When the legs are fully utilized, the initial action in the batting swing is much like Jumping.                                  

When a person jumps, they squat down, swing their arms back, then with a quick burst of energy, extend their legs while accelerating their arms straight- up. The first sections of this article describe the basic actions that create energy to produce a quick and powerful swing. 

At the end of this article, I share a very simple drill to help a young batter develop their ability to maximize the use of their legs in their swing.  All the information presented prior to the drill is meant to give some background on why this very simple drill is so important for a youth baseball or softball player to practice.


Vertical Jump Two Pics Crop.png

HOW POWER FROM THE LEGS IS MAXIMIZED IN THE SWING

The action of the legs when swinging a bat is very much like jumping. The primary difference is jumping takes place on a vertical plane, while the batting swing takes place on a horizontal plane.

The other difference is a batter doesn’t fully extend their legs (back leg to be specific) in the swing as happens in the jumping action. 

In the swing, a batter ANCHORS their back leg, which stops their leg extension mid-‘jump’. 

The ‘stopping’ of the ‘jump’ is a key to transferring energy and momentum from the legs to the hands. (Anchor is discussed further down).


Turn Back 4 - C Corea.jpg

WEIGHT SHIFT

The shifting of body weight in the swing is fairly subtle; there is much less movement in the weight-shift action than many people think - or teach. Reference to weight shift when working with kids is giving more info than they need at this early point in their development. Chances are good they will misinterpret this information to their detriment. Keeping the teaching focus on use of the legs, leg turn, balance and body control is more than sufficient.

In a ‘traditional’ stance, and in many of the stances we see at the professional level, the batter starts with their weight pretty much evenly distributed between their feet.  Their torso and head are centered between their feet.  Some batters have a little extra weight on their back foot/leg.

From this Centered and Balanced position, the batter shifts their weight slightly to their back leg - The Load

(The phrase ‘Turn Back’ is preferable to ‘Load’ when working with kids.  It is important that we recognize, in all our coaching communication, that kids have a smaller vocabulary than adults and have had less exposure to the terms associated with the game.  Many don’t know exactly what is meant by the term ‘Load’.   The phrase, ‘Turn Back’ is a literal description of the loading action.  When loading, a batter makes a slight inward Turn of their front knee and/or shoulder along with the slight weight shift Back.)

From the loaded (‘back’) position, the batter shifts their weight forward, to where their weight is, again, centered between their feet ...not forward (past center) to their front foot. A teaching phrase we use in Baseball Positive instruction is ‘centered’. During the instruction process, the constant use of the phrases/terms of ‘Turn back, Turn fast’ and centered evolve to our batter developing a solid ‘back to centered’ weight shift, without getting into the weeds of incorporating the addition instruction/information of ‘weight shift’ as mentioned earlier.

Batting Lower Half Turn JD Hernandez.png

In the 80’s, a more dramatic forward weight shift was taught by some high-level coaches; this trickled down to the youth level. This is still in use today to some extent. My observation is this focus on weight shift produces more harm than good for most kids eagerly trying to learn and please their coach.

In previous decades the stride was taught; this continued through the end of the century.  Today, the vast majority of MLB batters do not stride.

Other Baseball Positive articles address the Stride and Leg Turn action in more detail


The weight shift is from ‘back to center’, involving a minimal amount of forward movement.

It is during this slight movement, from back to center, that the batter is ‘Jumping’.  While it takes place in a small space, through this action a batter is fully utilizing the strength in their legs to generate power and energy for the swing. Many youth players are unaware of the importance of the legs in the swing and few, if any, are trained to maximize their legs in their swing.

The following information gives some basics on how the swing works.  This information builds off the points made earlier in this article. 


Anchor Altuve.jpg

ANCHORING THE SWING

The action of anchoring the swing has the batter driving the muscles of their back leg straight down against their back knee.  This driving down action takes place as the batter is turning their legs/hips,

A teaching phrase used constantly in Baseball Positive instruction is ‘Turn Fast’ - said with a lot of energy and emphasis.  Because most kids are not aware of the importance of their legs in the swing, or that the legs have anything to do with the swing at all, it is critical that we constantly talk ‘legs’.  When we teach, we want to put extra emphasis on our statements referring to the use of the legs.

The down drive of the back-leg muscles against the back knee is what ANCHORS the swing (prevents too much forward movement).

I have players do a drill with their hands on their hips, then give the command ‘Turn Back, Turn Fast’.  This is a drill we want kids doing constantly throughout their youth playing careers.

When the teaching focus is on Anchoring the Swing, I have them hold the finish position, then firmly run a hand down the side of their leg, so they get a ‘feel’ for driving down with the muscles of their back leg.  ‘Feel’ is an important part of learning muscle movements. 

At the end of the Leg/hip turn, the lower half of the body ‘stops’ right in the middle of the swing.  When the Legs/hips stop, the energy they produced has to go somewhere …it is transferred to the hands…this energy transfer is a  key to maximum bat speed and power.  If you watch a super slo-mo video of the swing, in most cases, you can see the lower half of the body (legs/hips) literally stop (watch the two videos below).

Javy Baez watch 1:05-1:15 …specifically note: 1:07-1:12

Alex Bregman watch 0:22-0:37


THE LEGS POWER THE HANDS IN A STRAIGHT LINE

Batting Half Way Sequence Horizontal Crop.png

The hands take the energy and momentum created by the legs to accelerate the bat to the ball.  The path of the hands in the swing, to and through contact, is a straight line (more or less). 

Extension Straight Line - End of Swing.jpg


The bottom hand ‘pulls’ the bat ‘half way’ towards contact point.  The bottom hand ‘stops’ (is finished contributing to the swing) midway through the aspect of the swing involving the hands. 


The top hand then snaps ‘all the way’, using a ‘skipping-a-rock’ action where the palm of the top hand is facing up through contact. 


Note: the action of the hands in the ‘swing’ is not a circular, as one might think, but more of a straight line.  An efficient hitter doesn’t ‘swing’ the bat, they ‘snap’ the bat.


Batting Deep Load Juan Soto.png

DRILL - ‘DEEP LOAD’

This is a modified version of the ‘Switch Heels’ drill shown earlier.  When the batter Turns Back we have them exaggerate this action by turning back a bit more than usual and sinking their butt a bit resulting in Deeper knee bend then normal.

From this Deep Load position, the batter Turns Fast and ‘Jumps’ to the ANCHOR position …and completes their swing.  This is all one continuous action from stance to the completion of the swing.

The drill is executed while working off a tee, doing soft toss (watch this video), or short front toss (see pictures Batting Practice, A 12-plyer Drill)

The ‘Deep Load’ is the key point of the drill.  In executing the deep load, the batter becoming aware of using their legs in the swing (simply gaining awareness of their legs is a ‘win’ in the learning process).  Over time they will gain a sense of the feel of fully utilizing the legs in their swing. 

 When working with smaller and younger players it is important to recognize that they have limited strength in their legs and we are asking them to perform an action they have never done before.  They will not master this the first time they try the drill….or the second time, or the third time.  It is important to understand, when working with youth baseball and softball players, they are not going to ‘get it’ as fast as we want them to.  In all our teaching, when working with young players, we must be patient with them…and with ourselves.

The loading action, as described earlier, involves a slight weight shift back while the front side of the body and/or front knee ‘turns in’ slightly. When turning back, the front heel comes off the ground.

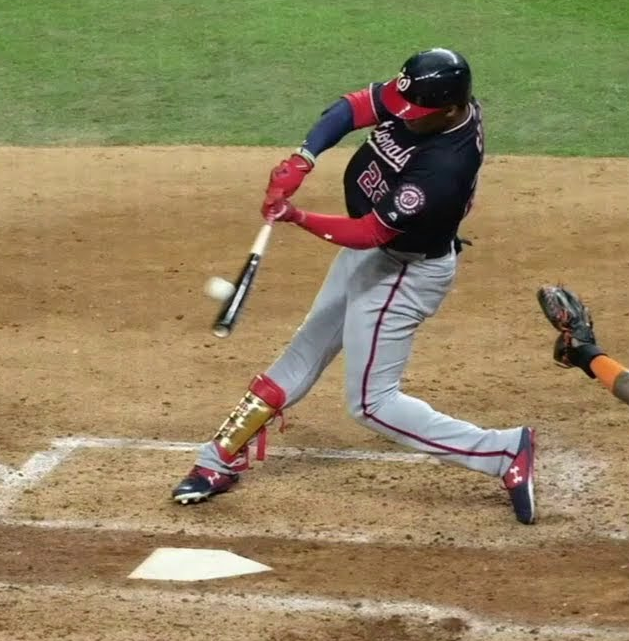
Batting Contact Point Juan Soto.png

(STRIDE is not mentioned in this article.  Watch MLB batters; very few stride.  Many simply ‘Turn Back’ as described.  Some pick up their front foot and set it right back down.  -  I don’t teach stride and I encourage youth coaches to avoid talking about striding to kids age 12 and under.  When they get to their teens, there will be a few kids who can benefit from incorporating a small stride into their swing.)

Prior to doing the drill we want to prep the batter with a brief explanation of the concept that the legs initiate the swing action and that the legs are where the power and energy of the swing is generated.

The info presented earlier in this article provides some talking points.  The age of the batter dictates how deep the conversation will be.  In any case, this prep talk should not take more than about 30 seconds.  We want to give the batter just enough info, so they understand how to do the drill, then we want to get them working.  

After they have taken some swings (10-15) their muscles will need a brief break.   During the break, we can give them a little more insight about the importance of utilizing the legs in the batting swing. 


RESULTS

This, like most drills, is not going to magically make a batter a superstar overnight.  This is an activity to include in a swing workout.  Over the course of time, the batter’s muscles will become trained to better utilize their legs, which will produce more power and bat speed.   

Note: it is important, when working with an athlete of any age, to limit the volume of information we give them at any one time.  This is an easier strategy to follow if we go into the teaching session with the understanding that we are not going to see miraculous improvements in just a few minutes.  The process of learning and improving muscle actions in athletes is a days, weeks, and in some instances, months-long proposition.


Was the Runner Out or Safe? …but what about the other runners?

Out or Safe 1 crop.png

Your shortstop makes a slick play, straightens up, makes a strong, accurate throw to first; it’s a close play.  The first baseman immediately turns and looks at the umpire wondering ‘was the runner out or safe’.  But that is not all, the runner is the first baseman’s classmate at school and they strike up a conversation…

Seen this before?  I can assure you this happens in every youth baseball and softball league all across the United States, Canada and across the globe.  But why does it happen?  How many bases and runs does a youth baseball or softball team surrender each year because of this common mistake made by young ball players.

We need to get into the brain of a young player to find out.  This is often difficult since our brains are grown up, have experienced the world and the game much more than our players.  We also struggle to address this and many other common mistakes kids make because we make the mistake of approaching our practice plans and teaching priorities from and adult perspective and not that of a kid’s.

Kids see the world much differently than adults.  First, for them the world still pretty much centers on their personal experiences.  Next, the focus on the current moment, the ‘now’, is very strong in a child.  While they are aware that the game extends beyond their position on the field and the play that just happened, they usually are not thinking beyond their small space and the moment.

This brings to the common scenario mentioned above.  Finding out if that base runner was safe or not on the ball the first baseman caught is really important to that child.  And they are very interested in the answer.  Also, our first baseman knows the base runner from school and knows them in that environment.  It is new, and interesting, to suddenly meet this classmate where they are both wearing ball uniforms and participating in a structured environment different than the one they are accustomed to at school.

It’s as simple as that.  And it’s as detailed as that - from the child’s perspective.

Of course when everyone starts yelling, “The runner is going home! Throw the ball home!” our little baseball or softball player is reminded there are more things to be concerned about than the umpire’s call and their classmate that is on the other team. 

Pause at 0:39-0:40. …look at the first baseman’s eyes. immediately to ‘the other runners’.

They snap out of their moment, turn to home plate but it is too late…or there is just enough time to make a reckless throw that the catcher misses and any other runners on the base paths advance yet another base.

So what can we do?

Simple, we add the concept of, and teaching phrase, “Look for Other Runners” into our drills.  And we stay firm in our teaching that as soon as a play is made on a runner or at a base, that part of the play is over and the player needs to look towards the middle of the infield (toward the other three bases) and move into a throwing position, so to be prepared to make an immediate throw if any of the ‘other runners’ are attempting to advance.

In the video to the right, the moment the first baseman catches the ball, he understands that, out or safe, the play at first is Over. His attention is directed to ‘the other runners’.

Drills that will train our youth ballplayers in the habit of ‘Looking for Other Runners’ are found below:

After your players have been exposed to this concept in a few drills we can apply the habit of ‘Looking for Other Runners’ to each instance of a play being made on a player or at a base in every drill and during scrimmages.  Ultimately these habits will carry over to our games.

Based on my observations of the youth game I suggest that making ‘Look for Other Runners’ a habit in our players, the result will be shaving two runs a game off our opponents score.

Got All The Bases Covered ...often stated, rarely practiced

Bases Covered 1800s Painting.png

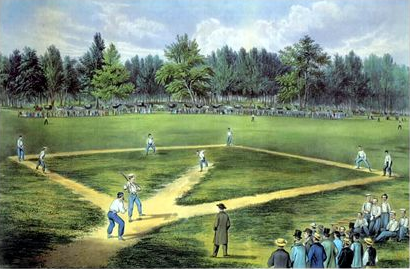
The expression, ‘got all the bases covered’ is commonly used in our culture.  This is a metaphor derived from baseball, but when you hear it today it is usually in reference to the planning or preparation of an activity.  All aspects of the activity have been considered; we are all set, there will be no problems.  However, there is one part of our culture where the literal translation of the expression is routinely missed …on the youth baseball field!!

Gosh folks, we are involved with a game from which this well-known expression was borrowed, but we fail to make it happen where the expression was born.  One of the most common mistakes made in youth baseball and softball, is players not covering a base or covering the wrong base.


The Wanderer

Our club is on defense, a ball is hit to centerfield and a runner is attempting to take third base. The outfielder or shortstop is ready to throw the ball to third, but nobody is at the bag to take a throw.  It turns out our third baseman has wandered 20 feet away from the base to get a better look at the outfielders chasing the ball. 

When the third baseman recognizes he is needed at the base to take a throw, it is too late.  The result is a confused semi-back pedal toward the base, eyes darting from the player with the ball, to the runner, to the base, and back to the player with the ball.  Given that the third baseman is somewhat in the vicinity of the base the player with the ball hurls it in, hoping that somehow an out can be made.  In the end the runner is safe, the throw gets past the base, rolls up against the dugout fence and the runner continues on to score.


Two Peas in a Pod

The opposition has a runner on first base; the ball is put into play somewhere other than to the second baseman or shortstop.  Lickety-split, both of those players run to second, anchor a foot on the base, extend their gloves, and battle to gain position to take a throw.  Their unfortunate teammate with the ball sees a blur of bodies, which includes the base runner, and is pressed to make a decision to hold the ball or chuck it on a wing and a prayer that someone might catch it.


But I Am Here to Catch Pitches

The ball is hit to shallow left field. As it is being fielded, the runner is just about to touch third base. The third base coach, knowing the kid out there has a weak arm, decides to send the runner home.  Our weak-armed left fielder makes the throw of his life; it’s right on target and arrives ahead of the runner. We are going to get him out!!

But the catcher is standing behind home plate, where he positions himself when catching pitches. He grabs the ball and lunges towards the plate to tag the runner.

”SAFE!” hollers the umpire.

We would have had the runner easy if the catcher would have been in proper position, covering the base - standing in front of the plate.

Not only would be have gotten the out and prevented a run, but our sweet little left fielder, not much of an athlete, would have been the HERO.  Perhaps only for that moment or for that day. But for that un-athletic kid, who likely will have a brief sports career before he moves on to activities better suited for his talents, it would have provided him a memory that would last a lifetime …that day back in Little League when he threw the runner out at home.


Why Do These Mistakes Occur Over and Over?

In pursuit of having our team prepared for the season, we go straight to working on ground balls, fly balls, pitching and batting.  We fail to make time to train and drill our players on How to Play the Game.  So, what to do? How do we train our players so that come game time we avoid situations where a base is left uncovered?  Or have a base (usually second) that is covered by two players? 

First, we need to address the mindset and perspective of the players.  Next, we need drills that help them learn and develop habits to fulfill their base coverage responsibilities.


Mindset

“Know what you are going to do if the ball is hit to you” - This phrase has been used for generations and is well intended.  Baseball and softball are thinking games, and once the ball is put into play, they are games that move at lightning speed.  And it IS important for a player to be prepared when the ball is hit to them.  The problem in this statement is that we are forgetting the other eight players.  How much time do we spend teaching our players ‘what to do when the ball is not hit to them’?

‘Baseball is a Game of Movement’ - we talked about players going to the wrong spot on the field when they do not have the ball (shortstop and second baseman both covering second base).  However, some players do not move at all.  If the ball is not hit in their vicinity, many young players just stand and watch.  It is important, early in the season (maybe in the first five minutes of the first practice) that we inform our players that ‘Baseball is a Game of Movement’.  The moment the ball is put into play, all nine players have a responsibility (Ball, Base or Back-up), and to fulfill that responsibility they need to move.  Then we need to reinforce this fact constantly during each practice and game throughout the season.


The Drill

The Infield Base Coverage Drill (diagrams below) is very elementary, easy to set up and only takes a few minutes to run.  We work using a ‘Mini Diamond’, which consists of bases laid out in a 20’ square.  The outfield is a good place to set up a Mini Diamond (we can have a group of players working in this drill, while another group is in the infield that can make better use of that space.  We put four infielders at their positions and a catcher behind home plate, then roll a ball to one infielder.   The crux of the drill is the other three infielders learn to execute ‘what to do when the ball is not hit to them’ - cover a base.

Note:  While this is a simple drill, it will not be until day three or four that it starts to run fluidly.  This, and any drill, is not going to run smoothly the first time.  Day One a drill is introduced.  The players get a vague idea of what they are supposed to do.  Day Two the kids have some recognition of what is going on and we get in a few semi-decent reps.  On Day Three the kids are familiar with the drill and we begin to get something of value accomplished.  In most cases, it is not until the team has had three days of exposure that we can go into a drill or activity with significant expectations for execution and being productive.

Having realistic expectations of how a drill is going to run is particularly important for a youth coach to keep their blood pressure at a safe level. [:o

Before looking at the drill diagrams and explanations, let’s identify the tools we will use to teach our players.

Teaching Phrase: “If you don’t the ball, cover a base” – Its one or the other.

Concept: ‘Four minus one equals three’ - There are Four infielders. One infielder gets the ball, the other Three cover a base.

Rules:

  • The third baseman and the first baseman have one base; the shortstop and second baseman have two bases

  • Each of the middle infielders (SS and 2b) has a base on their left, and a base on their right. 

  • —-> If the ball is hit to their left, and they don’t get the ball, they cover the base on their left.

  • —-> If the ball is hit to their right, and they don’t get the ball, they cover the base on their right.

Later we will address the responsibilities of the pitcher and outfielders, and expand deeper into movement responsibilities, for all nine positions, in a variety of situations.

Move Towards the Ball

Concept/Teaching Phrase: Move Towards the ball’ - this applies to the shortstop and second baseman. The idea of moving towards the ball (players at these two positions never run away from the ball) gets them started in the direction of the base they are responsible to cover, if they don’t get the ball. (Later we will apply this concept to the pitcher regarding their movement responsibilities. The three players in the middle of the field always move towards the ball)

The Infield Base Coverage Drill, when run consistently over the course of the season, only requires a few minutes.  It can easily be incorporated into any practice.  The best time to run the drill is during the ‘Skill Building Warm-up’ portion of practice.   It can also be incorporated into a team’s Pre-Game Practice Routine.

By making this simple drill part of our on-going training routine, come game day, we truly will Have All Our Bases Covered.

Infield Base Coverage All Four Positions Large Heading.png
Infield Base Coverage - Description.jpg

Prevent Injuries From Swinging Bats …carry the bat like the pros

Hit by a Bat.jpg

As a parent, what is your greatest fear for your child when they are playing baseball or softball?  Getting hit by a thrown ball?  A line drive hitting them while pitching?   Taking a ball in the teeth from a bad hop? 

Each of these scenarios can potentially result in a serious injury but are ‘part of the game’ and are not entirely avoidable. Getting hit by a bat swung by another player can be avoided by training our kids to always carry the bat by the barrel.


Severe Injuries Can Happen in a Split Second 

The video below shows an incident that happened during a major league game a few years ago.  Ryan Braun is swinging his bat, not in the on-deck circle, but near his teammates in the dugout.  This is a grown man who has spent his life at ballfields interacting with teammates.  Even with this experience it is possible to get into your own world as a player and forget for a moment what is going on around you. 

If this type of mind fart can happen to a grown man, a pro, it certainly can (and does on a daily basis) happen to youth ballplayers.  Any of us who have spent much time around kids baseball and softball have seen a player swinging a bat randomly somewhere on the field, clearly not being mindful that another player or coach might be walking by within range of their follow through.


Injuries Can Be Avoided

Every year large numbers of kids around the country are struck by bats being swung by other players. Some incur brutal injuries. In some cases, the aftermath of those injuries stick with them for life.  

There is a simple habit we can instill in our players that can virtually eliminate these unnecessary incidents. Teach our kids to always carry the bat by the barrel. The only time a bat should be held by the handle is when a player is positioned in the batter’s box, in their stance at a practice Tee, or during a coach supervised station set up for live swinging.


My hope is that every person reading this will forward it to anyone they know that is involved with youth baseball or softball: coaches, parents, and those in leadership positions in the leagues their kids play in.  Let’s get this information posted on league websites, be part of the pre-season info leagues distribute to their coaches and be included in the annual league Safety Meeting.

We can save kids from suffering severe injuries …and possibly save a child’s life.


Bat by Barrel 2.jpg

Simple Rules for Coaches and Leagues

Below are simple rules to have implemented by your team and league:

  • Hold the bat by the barrel when moving from place to place

  • When a bat is pulled from a bat rack, equipment bag, etc. the player immediately grabs the bat by the barrel

  • When a bat is picked up off the ground, it is picked up by the barrel

Also:

Bat by Barrel 4.jpg

When multiple batters are swinging a bat at one time in close proximity to each other i.e., a batting station during practice  (whiffle ball batting, tee work, soft toss etc.), no batter is allowed to move from their designated swinging spot until all participants have set their bats down.  All players move in and out of the batting station together.  If balls need to be picked up; all batters stop their swings and pick up balls together

No player is allowed to toss a ball up in order to swing at it i.e., ‘pitch to themselves’, play ‘golf’ with a ball that is on the ground, or any other such bat swinging activity not clearly defined by a coach/adult.


Train Kids to Develop Greater Awareness

In addition to training plyers in possession of a bat to practice safe habits, it is equally important to continually educate players who are walking around a ballfield without a bat.   They need to always be conscious of players around them who have a bat in their hands. 

Avoid walking near areas a player might be swinging a bat.  Be aware of all players who are nearby, even if they think nobody is in possession of a bat.  

Making this subject part of on-going conversation between adults and players gives our kids confidence to speak up in a case where they need to walk near a player holding a bat.  Tell them to boldly alert that player that they are approaching.


When Is a Player Allowed to Swing a Bat?

Bat by Barrel 3.jpg

There are only two instances players can hold the bat by the handle (making it possible to swing):   

  1. When standing at a spot that is designated by a coach/adult for working on the swing i.e. whiffle ball batting, batting tee, soft toss, etc. 

  2. When standing at home plate during batting practice, a scrimmage, or a game 

When they are walking to and from home plate, a practice area, and any other time they are in possession of a bat, they are required to carry the bat by the barrel.

Simply laying these rules out does not guarantee the kids’ safety.  Coaches and adults involved with a baseball or softball activity must take a hawkish approach to enforcing these rules all day, every day, all season.  We should only see kids holding a bat by the handle when they are getting ready to hit a pitched/tossed ball or when standing at a tee.  Any other time we see our kids around the ball field they either do not have a bat in their hands or a carrying the bat by the barrel.


How Does This Happen?

The incident (shown in the video) involving of Ryan Braun and Jean Segura never should have happened.  There is an on-deck circle for a reason; it is a designated safe place to take warm up swings.  Players and coaches know to be careful when walking near the on-deck circle and to walk wide of the that area when passing. 

In this instance Braun was the third batter scheduled to hit and Segura was batting second.  Braun wanted to start getting loose early.  Like any advanced hitter will do, he stopped to watch the pitcher take his warm-up pitches.  (At higher levels of play batters do this to identify which pitches they are going to see and to identify if a pitcher is having difficulty locating a certain pitch.)

It is likely he fell deep into thought regarding his upcoming at-bat and lost sight of the fact that he was standing close to many of his teammates and coaches.  While this does not excuse him from responsibility, it is understandable that it can happen.  The inexcusable mistake he made was standing in a high traffic area with a bat in his hands.  He should have been out in the on-deck batting circle.  He is allowed to be there if the actual on-deck batter has not shown up.


Video of College Softball and MLB Batters

Watch how the batters hold the bat after striking out and as they head back to the dugout.  Examples of of how the pros, and college softball players, carry their bat when they are not batting.  The proper way to hold a bat, when not batting, is by the barrel.


FSU Pitcher Jessica Burroughs Strikes out 13 - Watch:     0:03     0:28     1:22     1:53


Matt Cain perfect game - Watch:     0:55     1:38     2:14     2:20


Four good examples in each video are noted by the time stamps.  Those of you who are fans of great pitching may enjoy watching an entire video. Jessica and Matt dominate!


Bat by Barrel 5.jpg

Getting Buy-in from The Kids

Turning back to our kids; for these rules to be followed and for them to stick we must put ourselves in the minds and shoes of the kids. 

  • First, young children still see the world almost exclusively through their own eyes.  They are the center of the universe and their immediate wants and desires can override common sense and rules.  

  • Second, kids see the handle as being the only option for holding a bat (and holding can quickly turn into swinging). 

  • Finally, children (and most adults) do not immediately change their habits the first time they are told. 

We must be diligent in helping them establish the habit of holding the bat by the barrel whenever they are away from a designated swinging area and carrying their bat. (We adults must also establish this same habit when we have a bat in our hands; kids take their cues from us.)

How do we motivate our kids to establish the safe habit of always holding the bat by the barrel when carrying it from place to place?  Let them know that is how the pros do it (and point this out to them); the pros are cool  : )

Many kids want to emulate the pros and most want to look cool.  When implementing this rule, we do so from an adult’s perspective to maintain a safe environment for the kids.  When we present it to the kids, while we make it clear it is for the sake of safety, we also point out that carrying the bat by the barrel is cool …it is what the Pros do.


Starting today, let us teach our kids how to be cool …and keep everyone safe.


Coaching Youth Baseball and Softball - Podcast …practice planning and expectations for skill development in kids

Winning Youth Coaching.jpg

How did you feel following that last loss?  Or maybe it was a win, but you feel less than fulfilled knowing your players did not play up to their capabilities.


Can the quality of your practices be improved?  Looking for insights for better communication with parents, your players, or the coaches you work with?


Craig Haworth’s Winning Youth Coaching podcasts and website address these and many other topics.   Subscribe to his weekly newsletter and learn from top achievers in the youth sports world.


Recently I had the privilege of being a guest on Craig's podcast. We talked about practice planning and the pace at which young ball players develop skills and learn to play the game.

Breaking Pitches Are Easy To Teach …each one is thrown the same

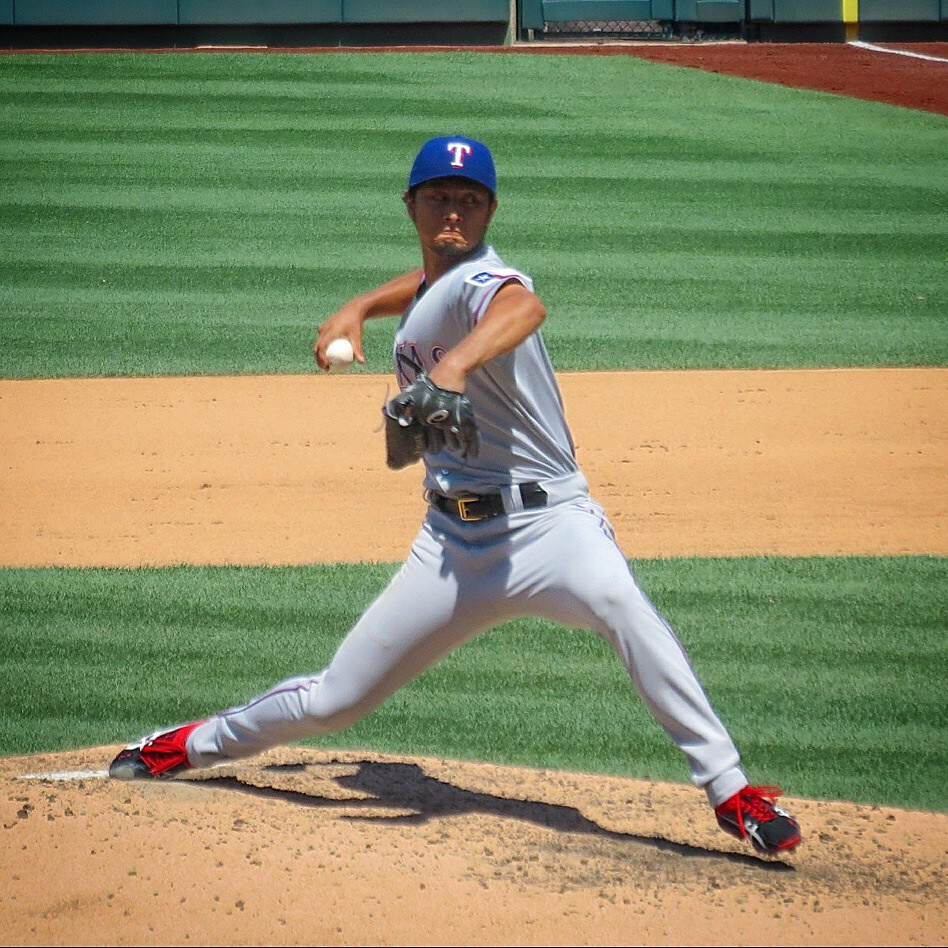
Pitching Stride Yu Darvish.png

Actions and Pace of the Delivery

The video below is a layering of five videos on top of each other. Former Texas Rangers pitcher Yu Darvish is pitching to Albert Pujols of the Los Angeles Angels. 

In each of the layered videos he is throwing a different pitch.  Initially it looks like a kinda blurry video of a pitcher throwing to a batter.  That is until he gets to his Release Point.

Regardless of which type of pitch is thrown the release point, actions and pace of the entire delivery (including follow through - acceleration down through release point) remain the same.  This is important for any coach or parent working with a young player to understand.

How Does a Pitcher Throw Different Types of Pitches?

While the actions of the delivery always remain the same, there are two adjustments a pitcher makes to throw different types of pitches:

  1. Grip

  2. Release

Regardless of the type of release, the action of the wrist/hand is always down.  There is no type of pitch that involves a ‘turning’ action of the wrist.


Our First Objective

This writing is not to describe the grip and type of release used for different pitches.  The objective is to establish the understanding that the actions of the delivery are consistent regardless of pitch type.  As youth coaches, if we can help a player develop a sound, consistent pitching motion, we are establishing a solid foundation from which they can add new pitches to their repertoire as they get older and stronger.

In other writings and information resources developed by Baseball Positive, more detail is shared regarding the teaching of the pitching delivery and throwing different pitches.  Of course, there are plenty of additional pitching resources at your fingertips.

The few points shared in this article are intended to serve as a basis from which to build your understanding of teaching pitching to kids. …and the video is cool to watch :)

Efficient Transitions In Practice …it starts with discipline in drills

Marching Band.png

A big time eater during practices is the transition between activities.  Maximizing efficiency in transitions starts with how we run drills.


Expectations and Enforcement

Each drill needs to have a clear objective and clear points the kids are working on.  'Clear' means the kids recognize what specific actions, within the context of the drill, they are expected to execute exactly as instructed. With the objective and focus points of a drill clear to the kids we next need to make sure the kids stick to the objective and focus points. This means if they don't execute a focus point of a drill properly we stop the drill and start over making it clear to the player(s) that we are not going to allow the kids to 'go through the motions', but that the clear expectations we laid out prior to the drill will be enforced.

As our kids develop the discipline of executing the key points of their drills properly, and recognize we are watching and enforcing, when it comes time for a transition to a new activity, the discipline established in the drill carries over to an efficient transition. "OK, you four line up behind first base, you four behind second base, you four behind third base.  No talking, no touching and eyes on the coaches, who will be at the pitching rubber." A command such as this will be followed and our transition to the next takes only seconds. This is a direct result of our establishing clear expectations and discipline in our drill activity.

NOTE TO PARENTS:  Any effective youth baseball or softball practice involves parents who help the coaching staff on the field during practice.  The info below will help a parent be a more effective helper.  The result is that your child will get more out of each practice and ultimately get more out of their overall experience. (see Parent Helpers)


How Do We Establish Discipline in Drills?

Before each drill:

  1. Explain the drill

  2. Make the objective clear

  3. Point out the key action(s) of the drill.

We’ll use ‘Rundowns - Ambush’ as an example   (The link takes you to the Drills page of the site.  ‘Rundowns-Ambush’ is listed alphabetically in the Table of Contents.)

Explanation

In this drill

  1. The two defensive players close in on the base runner from both sides. 

  2. The runner allows the defense to get them out on each drill repetition. 

  3. The base runner does not change directions. 

Objective

Defensive players learn to position themselves and follow the correct movements to execute the play

Key Actions

  1. The player receiving the throw moves to a point 10’ off the base

  2. Both players get on the same side of the runner. Player with the ball determines which side

  3. After tagging the runner, the receiving player “Looks for other Runners”

If any of these actions are not executed we restart the drill.  The players will not execute these properly, especially early on.  By making it clear to the players that they Must execute these actions properly otherwise we start the drill over.

None of these actions require athletic ability.  Anyone can do these actions as expected.  These actions are required.

It is important to recognize, as a coach, that poor throws will be made and throws will be dropped.  These mistakes are not a concern.  These skills will improve over time.  Our concern of coaches is that the players properly execute the key actions correctly.
 

Focus on Actions, Not Results

A common mistake youth coaches make is they focus on the ‘results’ of the activity and give feedback on the results rather than focusing on what we are teaching.   We are teaching the kids to learn the actions of the drill.  The objective of the drill is for the kids to learn how to execute the actions.

Through the repetition of coaches or parent helpers) demonstrating that only the proper execution of the key actions of the drill will be accepted and if those actions are not performed correctly, then the players will have to repeat the drill.

After it has been established, in the first few practices of the year, that discipline in executing the key actions in the drills is required and we will not allow the kids to ‘go through the motions’, this will carry over to transitions between drills and activities.

The result will be the transitions between activities will run smoothly and efficiently and we will get more out of the limited amount of time allotted to practice time.


What is the Definition of a Successful Coach?

Being an effective and ‘successful’ coach is less about ‘knowing the game’ and more about establishing a culture of structure of, and discipline in, practice activities.  Important Note: now that you have read this article, do not allow yourself to think that suddenly things will magically work well.  Running a structured and disciplined practice is a skill, just like batting and throwing.  It takes time, repetition and yes, mistakes to develop a skill. 

Stick to your plan, do your best and when things don’t get frustrated when things go sideways, because they will.  Learn from each experience and as the season progresses you, your assistants and the kids will slowly and surely improve in transitioning from one activity to the next during practices.

Watch An MLB Playoff Game With Your Child …learn the fundamentals of the batting swing

Canadian Ballplayers Larry Walker 2 Balance Extension.jpg

The Major League Baseball Playoffs have begun.  This is a time of year when the best teams in the game are playing almost every night in prime time giving us a chance to sit down with our kids and watch a game together.  Today’s analysts are so knowledgeable, and we have great technology allowing us to see the game so clearly.  Pitching and the batting from various angles; and constant replays in high definition, slow motion.  Right in front of us and our kids is the opportunity to learn and better understand the game.


Help Your Child Learn About The Batting Swing

Pick out a game and sit down with your young ball player and watch together.  From the standpoint of learning, it is not necessary to watch an entire game.  Just a few innings can do the trick.  Let us take this time to help them learn about the batting swing.  What?  That is complex stuff; how can that be done in a few innings?


Legs Are The Power Source For The Swing

In most athletic actions the legs are the power source for, and initiate, the overall body action.  Ask your child, “What does a batter use (which part of their body) to swing the bat?” The logical answer is a batter swings the bat with their arms. After getting that answer, tell your child, “Ya know, I’ve been told that batters swing the bat with their legs.” That will likely get you and odd expression from your child followed by something like, “Well that person sure is dumb.” Your response, “Well let’s watch and see.”  


Replays Are The Teaching Moments

On replays, you and your child agree to only look at the batter’s body below their belt.  Your child will see an aggressive powerful turning movement of the batter’s legs. In slo-mo replays, you and your child may be able to pick up how the legs start their turn a hair sooner than the upper body and arms. …The legs power the swing …Hitters ‘swing the bat with their legs’.  The simple recognition of how important a role the legs play in the swing is a major step forward in them being better the next time they pick up a bat.


Teaching Young Ball Players How To Slide …easy as riding a roller coaster

Slide 1.png

Most youth baseball and softball players can learn to slide properly and safely when taught correctly. A simple step by step teaching approach is presented below. 

An important element of a successful slide is to generate a lot of momentum when running.  Good sliding technique also requires a player to lean back and drop while maintaining their running speed.  Coordinating these two elements is where kids run into challenges. 

The kids we work with will pretty much fall into one of two groups.  A few will be tentative, and a bit concerned about hurting themselves.  Most will be eager to start sliding, possibly a bit over eager.  The important point for a coach is to be prepared to work with both types of player.

The good news is we have a teaching approach that will build confidence in the tentative kids and reign in the enthusiasm of the others, so they learn to slide effectively and safely.


Establish a Comfortable and Safe Learning Environment

During sliding practice, the kids are going to spend a lot of time on the ground.  We want to identify a day when the elements are best for teaching this skill.  In the south, a day after some rain softens up the ground is ideal; in the north we want it to be warm enough that wet bodies do not catch cold.  

Grass is the best surface on which to learn to slide.  Ideally, we practice sliding on damp or wet grass.  If your field has access to water and a hose, use it.  A well-watered surface becomes a slippy-slide, which makes the activity easier for the kids and a lot of fun.  Water down the 10’-12’ of grass in front of the base.  The wet surface limits the amount of friction build-up on those little legs and butts. 

Coaches in the north, alert parents prior to practice.   Run the sliding drill at the end of practice.  Assuming the kids will get wet sliding, we want them to get to their warm cars and get home as quickly as possible.


Instruction Sequence

STEP 1

Sit the players down facing the coach.  Players and coach have both legs extended straight out in front.  Tell the players to tuck one foot under their knee.  Important: coach demonstrates first with one foot tucked and then the other.  Show both options as quickly as possible.  Players differ in which foot they are comfortable having tucked under their knee.  Kids tend to copy what the coach does; we do not want to influence a player to tuck the foot that is not natural for them when sliding. 

This positioning of the legs creates a ‘number 4’.  This is called a Figure-4 sliding position or a bent leg slide.  The Figure-4 is the most common sliding technique. 


STEP 2

While sitting in the figure-4 position have the kids rest their hands on their knees.  Now it is time for the players to pretend they are on a roller coaster going down a big, steep drop.  Coach hollers, “Ready… Slide!”  Everyone throws their hands up over their head and yells “wheeeeeeeeeeeeeeeeeeeeee!”

This is silly time for the kids, and they love it.  Repeat this 3-4 times.  Egg them on to be loud and have fun with the exercise.


STEP 3

We are still playing roller coaster, but now as the kids throw their hands up, they slowly lean back until they are lying on their backs.  When they complete this action, we want to emphasize that they want keep their hands well off the ground.

Repeat 3-4 times …or more if they are having fun. :)


Step 4

Set out three or four bases approximately 15’ apart.  Bases can be a cone, a throw down base, a cap, hoodie, etc.  Break the kids into groups, one for each base.  Line them up about 40’ from the bases and get ‘em ready to run!

Important: Ideally the kids practice sliding without their shoes on; socks don’t get caught in the ground.  Catching a cleat while practicing sliding can cause a serious leg injury!  At worst have the kids wearing sneakers - NO CLEATS ALLOWED!!!  There must be advance communication with parents, so the kids can bring a pair of sneakers to this practice.


Teaching Points

The Body Contacts the Ground at an Angle

The part of the body that lands first when sliding is the butt.  While standing/running this part of the body is a couple feet off the ground.  Some kids who are new to sliding imagine how much it would hurt to drop straight down on their butt.

We want to explain that while they are dropping down, if they are running as fast as they can, their hips/butt are also moving forward.  This combination results in their butt contacting the ground at an angle, which greatly minimizes the amount of weight and pressure on the hips/butt area.

How to demonstrate: Start 30’ from the base.  Jog to a point 8’-10’ from the base (this is where a kid will begin their slide; actual distance varies by age).  Before taking off, tell the kids to notice how your hips are moving forward through space.  This seems elementary and obvious, but it is important for them to see this, not just a picture in their minds.

When you stop at the point 8’-10’ from the base, explain that is where they begin their slide. (When drilling younger kids, it can be helpful to place a marker ahead of the base to help them identify where they begin their slide.)

From this point, use your hand, starting at hip level, to illustrate a downward angle to a point on the ground (or as far as you can bend down ;) ) a couple feet in front of the base.  Explain to the kids that you are showing them the path of their hips/butt as they move toward the point they make contact with the ground.  

When their body contacts the ground at an angle, with forward momentum, the ‘weight’ of their body at contact is reduced significantly.  They can imagine a huge jumbo jet landing.  A mega-ton airplane contacting the ground at an angle eliminates most of the stress of the plane’s weight on its landing gear.


Run Full Speed

Velocity and momentum are needed for a good slide. Remind them to keep running full speed into the slide.  Some kids are still tentative about dropping to the ground and will slow down prior to starting their slide.  We need to continue to encourage them to maintain as much speed as possible.  The faster a player is running the flatter the landing angle of the slide.  The flatter the angle the less impact when landing.


Lean Back

As a player leans back to start their slide, the hips naturally get lower to the ground reducing the distance between the hips and the ground.  This also puts the body in a better angular position for sliding.  This action, combined with momentum, further reduces the impact when the butt meets the ground.


Throw Hands Up While Leaning Back

Keep in mind that with the hands in this relationship to the body, there is a sense of a loss of balance and body control.  This is an action and body position many kids are experiencing for the first time.  It takes repetitions for the body to get used to any new action.  Not only is it important for us to recognize this when coaching, but to clearly communicate to the kids that we understand this action may feel awkward and uncomfortable at first.  Educate them that after they have practiced this new action a couple dozen times it will become familiar and much more comfortable.


Two reasons for throwing the hands over the head when sliding

1.  There is more padding in the butt than the side of the hip and leg.  Sliding on their side can tear up the skin and leave a painful raspberry (when sliding on dirt or artificial turf).  These can take a week or more to heal and disrupt their play in future practices and games.

2.  Many experienced players, including those at the highest levels of play, still tend to slide on one side and put a hand down.  This puts the thumb, wrist, and fingers in danger of being injured.  While it does not happen that often, there are plenty of players each year who miss 2-4+ weeks of playing time because of a nasty sprain or break.


Keep the Foot of the Extended Leg off the Ground

This is serious business for safety reasons.  If a player allows the lead foot to touch the ground, a cleat can catch.  If the ground does not give something in the leg has to give; an ankle, knee, hip, or bone - ouuuuuch!  The heel of the lead foot contacts the side of the base.  The knee of the extended leg remains slightly bent.  This allows for the stronger muscles of the upper leg to absorb most of the impact of the foot hitting the base. 

Older players, who generate a great amount of momentum, will learn to convert that momentum into ‘popping up’ onto their feet after hitting the base.  Younger players will have the muscles of their upper leg absorb what energy remains when they contact the bag and finish laying on their back.   

For all ages, kids that are lighter or faster will have an easier time developing the ability to pop-up.  Heavier or slower kids will take longer.  We should not anticipate kids being able to execute the pop-up action before age 10 or 11; some not until they are a teen.


Important:  We need to teach our players to immediately identify where the ball is after completing their slide.  Either visually or looking to a base coach.  At this level of play thrown balls often get past the player covering the base.  Quickly identifying where the ball is, can mean the difference between advancing to the next base or having to stay put.


Aren't We Playing Tag? ...what kids are really thinking

Runner at First Base

Playing Tag.png

“Nah, nah, you can’t get me!” This is the challenge the base runner at first base offers to the pitcher as he returns to the mound at the end of the latest play between two teams of 10 year olds.  The base runner moves a bit further off the base, far enough for the pitcher to think, “I could throw the ball to the base and we might be able to tag ‘em out!”

The base runner increases the temptation by doing a little back and forth dance.  The pitcher first retaliates with a series of pump fakes in an attempt to scare the runner back.  The kids are no longer playing baseball, it has evolved into a game of the base runner baiting the pitcher into risking a throw to get him out.  It’s become a game of tag within the context of a baseball game.

A few moments later the base runner is at third, having succeeded in tempting the pitcher to make an ill-advised throw that, Surprise!, got past the first baseman.


Runner Between Bases

A base runner finds herself between bases when a defender has the ball in their hands.  She may have arrived there as a result of a base running error or she may be aggressively attempting to get an extra base, instinctively knowing that if she can force a defensive player to throw the ball there is a good chance a mistake will be made. 

The base runner is saying “Ha, ha, you can’t catch me!”  The response of the defensive player is, “Oh, yes I can. You just watch!”  However, the defensive player hesitates just long enough that her throw arrives at the base the same time as the base runner.  The ball gets away from her teammate allowing the base runner to advance to the next base.  It is not a stretch to imagine that the throw to the next base the runner is advancing to, arrives late, is misplayed, and the base runner to go on to score.


Mindset

Let’s step inside the mind of a child and look at these two scenarios from their perspective.  They know they are playing baseball or softball, but in these particular moments they view the situation, consciously or subconsciously, as another variation of the schoolyard game of tag.  Playing tag is a big part of a kid’s life and few other activities invoke their competitive juices or produce more giggles and great fun for kids.

Also, we must understand that a kid’s world is very much focused on the here and now.  Each moment in their young life is very significant.  When looking at these situations from their perspective it becomes easier to understand the importance of them getting that out.  They are less able to rationalize the risk-reward of the situation as an adult would.  Therefore they are inclined to try and get that runner tagged out now, rather than looking ahead to the next batter and a new and safer opportunity to record an out.


Teaching

The first step in our effort is to help them view the situation in the broader context of the game.  This begins with pointing out to them that “The runner is going to be safe A LOT” over the course of a game.  Ask them how many runs are scored in a typical game?  Next ask them how many times runners have to be safe in order for that many runs to be scored?  The final question to ask is “How many times is a ball thrown past a base each game?”  

The answers they give are irrelevant.  We know in advance the numbers they give will be fairly large.  The key to this exercise is they verbalize the common reality that runners are safe quite often, many of them come around to score …and a fair number advance around the bases and score, in part, as a result of overzealous efforts on the part of the defense.  They get caught up in the mindset of playing tag at this moment instead of softball or baseball.


How the Game Works

The basic objective of the game, when an out cannot be recorded, is to stop the runner(s).  If we cannot get the runner out in a given situation, the next best alternative is to stop the runner from advancing to the next base.  This is usually accomplished by throwing the ball to the base ahead of the runner, but can also be accomplished by running the ball to a point in the baseline ahead of the runner.

The next objective is to securely get the ball to the middle of the infield and in the pitchers hands.  When the ball is located inside the infield diamond it is a threat to a runner standing on any base.  When the pitcher has the ball, they have control of the game and can choose to move the game along by stepping on the pitching rubber and looking ahead to the next batter.

Our challenge as coaches is to make pitching to the next batter the mindset of our players, instead of engaging in a game of chicken with a runner at a base who is baiting them to attempt a reckless throw. A key perspective to teach our kids that once the runners have stopped at a base, our job on defense has been completed.  …Now it is time to get to work on the next batter.

One of the greatest challenges of working with young kids is trying to see things from their perspective.  (This is also one of the great joys, because, in these moments, we get to be kids again.)   Before we can successfully teach them we need to start the conversation from their perspective, then guide them to make better decisions based on how baseball or softball are played.


Pick-off Throw To First Base ….ohhhh, and the ball is down the right field line : (

First Base Pick off attempt.png

Mindset

One aspect of Pitchers having trouble throwing to first base is Mindset.  Think of what we call the move to first: “Pickoff Move”.  The long used phrase ‘pick off’ by coaches (and players saying it/thinking it themselves) has morphed into the mindset that the purpose of this play is to generate an out – pick the base runner off first.  Too often the result is pitchers trying too hard to ‘pick the guy off’ and firing the ball past the first baseman. 

The pitchers’ actions become too quick, undisciplined and to some extent, out of control which leads to poor throws.  Also, pitchers often try to throw the ball too close to the ground (where the first baseman would be in a better position to apply a tag).  “Hey, I gotta throw the ball down by the bag, so we have a better chance to pick that guy off.”


What is Our Objective When Throwing to First?

Let’s ask ourselves the question, “what is the objective of throwing over to first base?”  Are we really trying to generate an out? …or perhaps are we simply trying to ‘Hold the runner close’? …or disrupt their timing? …or to wear them down and slow their jump? …or create anxiety by sticking in their mind that, ‘Yes, the pitcher Will throw over’?

When I was a head coach in college we changed the phrase ‘Pick Move’ to ‘HOLD Move’.  Our objective was to re-set our pitchers’ mindset when they threw to first base.  We taught them that we are not trying to ‘Pick the Runner Off’, we are working to ‘Hold Them Close’.

Questions:   1. What percentage of throws to first base result in an out?  I don’t have any stats, but I’ll suggest the number is less than 5%.    2. At the amateur/teen level of play, what is the percentage of balls thrown past the first baseman? …I don’t have a stat on that either, but I will suggest that the percentage of balls thrown past the first baseman is higher than the percentage of throws that result in an out.

We taught our college pitchers to throw to first base at the first baseman’s chest level, not low to the ground, near the bag.  By practicing with this mindset our pitchers became very good at making catchable throws consistently.

Who is Responsible for the Out?

Another question to ask (and this might be easier for those of us who were base-stealers in our playing days) is:  When a base-stealer is Picked Off, was it a result of the pitcher making a quick and awesome throw, or was it a result of the Runner ‘Getting Themself Out’? ie, they were ‘leaning’, or their first move was towards second base, when the pitcher threw over, and as a result they were late in getting back to the base?

We told out college pitchers, “Make consistently good, catchable throws to first base and give the base runner the opportunity to ‘get themselves out’”.  Given this new mindset, our pitchers learned to coolly and confidently throw over to first more frequently.  The more we threw to first, the greater the chances of the runner making a mistake and ‘getting their self out’.  …no we didn’t throw over a zillion times each game ;) but we wouldn’t hesitate to make back to back throws to first in base stealing situations and counts.

We did not keep stats on this, so I can’t say it produced more outs, but I can confidently say that the occurrences of ‘throwing the ball away’ was very low.

Let’s teach our pitchers the mindset of ‘Holding the Runner Close’ on their throws to first rather than making a ‘Pick Off Move’ and we will reduce balls being thrown away and possibly, in the process, generate more outs by giving the base runners more chances of ‘getting themselves out’


Technique For (Right Handed) Pitchers Throws to First Base

Making consistent quality throws, for any position, and most throwing sports for that matter, is based on good Footwork.  The process for teaching and training pitchers to throw consistently well to first base begins with Training proper footwork.

Step 1 – No Ball is Used

Pitcher comes to the set position, then makes a 90 degree turn (very low two footed hop) in the direction of their glove side.  In the process they separate their hands and bring their elbows up to shoulder height to a throwing (power) position.  At the end of the action, we want their feet to be wider than shoulder width and be able to draw a straight line from the tip of their right foot, through the tip of their left foot, to first base.  The line from their back elbow, through their shoulders, to their left elbow also needs to be straight towards first base.

More than likely the pitcher’s feet and elbows/shoulders will not be lined up properly in their first try and likely not in many subsequent tries.  The purpose of the drill is to train this action, so the pitcher is in a good throwing position and lined up properly to throw to first base, each time they execute the action…this is more than a one day process.

Note: this drill does not need to be done on the pitcher’s mound.  It can be done along one of the foul lines in the outfield (leaving the infield area for position players to work).

This action is executed over and over with the pitchers and coach checking their body alignment after each repetition. – Do ten reps of the action.  


Step 2 – Include the Ball

After doing this ten times without a ball, add the ball to the action, so the pitcher is finishing in a proper throwing position. – Ten reps using a ball.


Step 3 – Throw ‘to First Base’ From the Throwing (power) Position

Have your pitchers partner-up and stand the same distance apart as is the distance between the pitching rubber and first base.  The pitchers throw to each other, from the throwing/power position, with the chest area of the ‘first baseman’ as the target (note: a first baseman is bent down some when taking a throw from the pitcher, lowering the target area slightly) – Ten reps


Step 4 – Execute the Entire ‘Hold’ Move

It is critical that we instruct our pitchers, in the early stages of training this skill, to practice the action at a Controlled pace….half to three quarters speed and with just a Firm toss to first base, not all out. – Ten reps


Progression of Skill Development

We put our pitchers through this routine for two workouts.  It is critical that throughout the process we are constantly working on establishing the mindset that they are working on a ‘Hold Move’, not a ‘pickoff move’.  We must monitor the pace of their actions.  Kids naturally want to show how good they are at physical skills; they will try to go too fast, too soon.  We Will have to remind them to work at a Controlled pace and explain to them that First they need to develop the muscle memory of the actions, Then, after they have demonstrated consistency in executing the actions, we will start to speed things up …on days 3, 4 and beyond.

Our objective is, by the end of the second workout, that the players develop some level of mastery of the actions and have been successful in making fairly accurate, catchable throws to ‘first base’.

On subsequent days of work, based on our observations, we direct the players to increase the speed of their actions bit by bit.  It is likely that we will not reach full speed in the actions until Day 4 or 5.  The progression of the group depends a lot on their age, how quickly they grasp the concept that they are not trying to pick the runner off and their level of focus and commitment to learning.


The Secret To Hitting A Curve Ball …and how to teach it to kids

Charlie Brown Batting.png

“It’s a curve ball, and there is another swing and a miss!”

“He takes that curve ball out of the yard; another monster blast!”

Why do so many batters struggle hitting a curve ball while some seem to have great success against this pitch?  There is a simple approach to having success hitting the curve…

Understanding The Curve ball

I’ve spent 40 years in baseball as a player, coach and instructor.  In addition, I’ve had the good fortune of being around my younger brother, Todd, who played in the Major Leagues, which exposed me a bit to that level of play.  Over the years, I’ve heard a zillion conversations about how to hit a curve ball. 

A couple of thoughts before we get into the ‘How to’ part.

Youth pitchers, as well as young teens and some high school age pitchers, are just beginning to learn how to throw a curve. Most don’t throw this pitch well on a consistent basis.

The advantage a youth pitcher has in throwing a curve ball, good, bad or ugly, is the batters facing the pitch have seen very few curve balls in their lives.  A  pitch that is different visually, then a straight fast ball, is a strange and uncomfortable experience for a young batter.  Simply showing the batter a different look can make the curve an effective pitch as long as its somewhere near the strike zone.  But what about hitting the curve?  Keep reading.

I attended a baseball coaching conference years ago where I sat in on a discussion by a well-respected college coach who broke down the statistical results of curve balls thrown by pitchers.  I’m quite sure his numbers were not scientific, but feel they make the point and I believe most coaches at higher levels of the game would agree his numbers are pretty solid.

He said that a good pitcher will locate, maybe, half their curves in the strike zone.  The other half miss the zone and a fair number of those bounce in the dirt.  Of those that are in the zone, about half will be good ‘pitcher’s pitches’ (at the knees and on the edge of the plate).  About half will catch a larger portion of the strike zone.  I will come back to these points in a bit.


Training a Batter How to Hit a Curve ball

Like most topics in baseball, and in sports, we can find a wide variety of ideas of how to address a given issue. Here are some examples of ways to address ‘How to Hit a Curve ball’ that you may have heard:

  • Know the pitcher’s patterns, so to anticipate when a curve will be thrown

  • Factor in the game situation and what the batter and pitcher are each trying to accomplish, so to better anticipate the curve

  • The depth in the strike zone to best contact a curve ball

  • Practice hitting the curve ball to the opposite field

  • Set up a JUGS pitching machine throwing curves that are knee-high on the black and practice, practice, practice

Some of these, in my opinion, can be helpful depending on the age and type of player we are working with; some I am not personally a fan of.  In most cases, much of what is offered is beyond what youth baseball players can take on; or they  require more time than we realistically have  with our players, or with our own child.

The approach to teaching kids how to hit a curve ball, that I suggest, is very simple and is the same approach that many MLB batters take when hitting the curve.


The Secret

First, we must recognize that even the best MLB batters rarely hit a well-located curve ball for a base hit.  So, the answer to the question, ‘How do you hit a (good) curve ball’ is ………You Don’t

A batter who is successful in hitting the curve ball doesn’t swing at those that are well-located .  They let those pitches go by, even if they are going to be called a strike.  A good batter understands that hitting a well-located curve ball, in most cases, ends up as a ground out.

So what is the Secret?  “How do you hit a curve ball?”.    ……Let the good ones go, and swing at the bad ones.

Yep, that’s it……seriously. 

Again, he best batters in the world don’t hit a [good] curve ball very well.


Identifying a Hitable Curve ball

Success in hitting a curve starts with seeing the spin of the pitch.  This is not easy to create in a practice setting by a youth baseball coach or player.  However, we can at least explain the difference in the look of the fastball spin versus that of the curve ball spin.

A fastball has greater RPM.  It’s spin simply looks like a ‘blur’; there is no distinctive spin to identify.   A curve ball, on the other hand, has a lower RPM and an angled ‘spin’.  It has a much different look when seen from the batter’s perspective.

Rule of thumb…when the batter ‘sees spin’ (this is also applied to a slider) and the pitch is coming in belt high or lower, chances are it will ‘break’ out of the strike zone or to a point in the zone where making contact will likely result in the ground out mentioned earlier…..a good batter let’s this pitch go by.

When the batter ‘sees spin’ and the pitch is coming in above the belt, that pitch, more than likely, is going to be a ‘hanger’; a pitch that is easier to hit and will be at a point in the strike zone where the ball can be hit harder and further.  Also, when a pitcher throws a curve ball that starts out high like that, they have not produced good ‘down leverage’ at release point (forgive me for getting technical) and the pitch will have less break. 

Batting Practice

Front Toss.jpg

When I am working with young batters and their coaches/parents, I suggest they dedicate their practice time hitting pitches at belt to belly button height, be it off a tee (video), during soft toss (video), wiffle ball batting practice (video - watch 0:39 - 1:22) or front toss (picture). When batting in a game, we instruct our batters to anticipate a pitch being higher in the zone and when they get that pitch we want them to be very aggressive in swinging at those pitches. 

Following this rule is simpler for a novice batter who has not gained the ability, comfort level and confidence in seeing and recognizing the spin of different pitches.

Few youth pitchers can consistently command their pitches low in the strike zone. In most cases a batter at the youth level of play will see a pitch or two in the middle to upper part of the of the strike zone in most at-bats.  Having our batters practice the majority of their swings on pitches higher in the strike zone will result in them developing the habit and discipline for swinging at pitches in this area, and the ability to hit them well. 

If you have access to a JUGS pitching machine (many indoor batting facilities have cages you can rent that have JUGS machines). Set up the machine to throw ‘bad’ curve balls where the majority of the pitches are coming across the middle of the plate at belt to belly button level. 

Instruct your batter(s) that this is the curve ball they want to swing at (not the ‘good’ curve ball that is crossing the outer edge of the strike zone at knee level).  We want to have our batters seeing and practice hitting the ‘bad’ curve ball that comes in higher in the zone and with less break.

(One of the catch phrases in baseball, in recent years, is ‘Pitching to Contact’.  This refers to a pitcher getting batters to hit well-located pitches and getting themselves out.  It takes a lot more pitches to strike a batter out than it does to get a batter to hit the ball into an out.  This is a concept we might like to share with our pitchers, while reminding them that in most cases they are subject to being pulled off the mound by a pitch count rule.)

In a perfect world, we would have the ability to throw live curve balls to our player(s) in a practice setting.  This is ideal because they get valuable reps at ‘seeing spin’ and developing the discipline of swinging at the ‘bad’ curve balls and letting the ‘good’ ones go by.  Even if we are unable to throw many hitable pitches, there is value in this exercise; giving them reps in seeing the curve ball spin.  All said, I wouldn’t count on this option too much.  Most youth baseball coaches aren’t practiced in throwing curves.  And for most, this is going to result in quite a bit of arm soreness the next day: )


Simply Put

Preach to your kids: “Let the good ones go; swing at the bad ones”   …that is ‘How To Hit a Curve Ball’.


Fly Balls Three Toss Drill …multiple skills, fast paced, lots of reps, fun

Trout.png

How can we improve out players’ fly ball catching skills in a short amount of time?  The ‘Three Toss Fly Ball Drill’ is part of the solution. It is great for infielders as well as outfielders; is challenging and fun.


The Drill

This drill is run at a lightning fast pace.  The player is moving at full speed throughout.  The pace, coupled with the changes of direction, conditions, builds agility, and develops a variety of catching skills. It is applicable to any age ...including teens and high school players.

The player catches three different fly balls in this drill, which takes 7-8 seconds per player:

  1. Ranging Laterally

  2. Coming in

  3. Going Back

Fly Balls - 3 Toss Drill -.jpg

Ideally this is run with no more than 3 or 4 players.  Once each player has been through the drill, the time spent waiting for their next turn is spent catching their breath. If we start with a bucket of 30 balls, depending on the age and skill level of the players, we can get through 15-20 reps, before having to take a break and pick up the balls. 

The best situation for using this drill is as a station in a skills rotation.  During a five-minute stop at this station each player will get a chance to make a play on 20-30 fly balls.


Keys For The Drill To Be Most Effective

  • Coach makes low arcing throws – this is Not a drill to train kids to judge high fly balls; we are working on the skill of catching a ball while on the run. Coach is a quarterback throwing passes to a receiver.

  • Use an underhand arm action when tossing – this is much more accurate than throwing overhand

  • If there is a left-handed player in the group, and you have younger kids (nine and under), run the left-handed player in the opposite direction for the first toss. Otherwise they are making a backhanded play, which is much more difficult.


Keys For A Fast Pace

  • Most important – if a ball is not caught the player does not retrieve it; they get ready for the next toss

  • Coach is constantly reminding the players to ‘sprint full speed’

  • Have as many balls on hand as possible

  • Limit instruction to two points:

  1. Run full speed

  2. Catch the ball away from your body – reach out with the glove arm

…this is a repetitions activity, not a teaching activity.  Make a mental note of teaching points to share afterwards.

                                                                                                                    <SEE THIS DIAGRAM ON THE BASEBALL POSITIVE WEBSITE>


What is Going to Happen?

  • Coach will make inaccurate tosses – no big deal. Tell the player, “Hey, bad throw, I’ll get better; keep moving”

  • Players will miss catches – we clearly instruct them, prior to the drill, that when they miss a catch, to not stop to pick up the ball. They are to get to the next starting point asap and get ready for the next toss

  • The rhythm and flow of the drill, the first time it is run, will be a bit clunky – any new activity is less than perfect the first time around.

Advanced Training For Your Child? …what you need to know

Juggling Chainsaws.png

Mechanics are Fundamental and Basic

From time to time I hear parents state, “I am looking for an advanced level of training for my child”.  I tell them there really isn’t much ‘advanced’ stuff for 12U kids to learn.  The physical movements of the game are the same for a kid as they are for a Major League Player.  What this means is MLB players aren’t doing much that would be classified as ‘advanced’.  Those players are simply bigger, stronger, faster and more practiced in their movements, but those movements are nothing more complex than what they did when they were kids themselves..

This fact was reiterated to me by my ‘little’ brother Todd, a former Major League player (then went on to serve as a minor league batting instructor in the Giants organization).  He said, “let the coaches and parents know that the game I played when I was 12 is the same as the game I play now”. 

The Advanced Aspects of the Game: Mental Approach and Strategy

The true ‘advanced’ aspect of the game comes into play for players when pitchers develop the ability to consistently locate pitches and throw a decent off-speed pitch.  This aspect of the game doesn’t evolve until kids are 14 or 15, at the earliest.  At that point the ‘advanced’ aspect of baseball is more mental than physical.  (Right now our goal is simply to keep kids in the game long enough to experience it at an ‘advanced’ level.  Less than 25% of youth players continue to play the game past age 12.)

At that point in the evolution of a player we start working on their mental approach to the game.  Batters learn to go to the plate with a plan based on the game situation (inning, score, location of runners, number of outs, etc.) and a knowledge of what types of pitches a pitcher has and their ability to locate those pitches.  We talk to pitchers about their approach to a given batter, again based on the game situation and what knowledge we might have of the batter (running speed, power, likelihood to pull the ball or hit to the opposite field, etc.)

Kids First Need to Master Fundamental Skills

Todd Fielding.png

Kids aged 12 and under really don’t need ‘advanced’ instruction.  They still have a ways to go to master basic movement skills.  A big factor in gaining this mastery is related to their size and strength (movements in baseball, unbeknownst to most, require great strength); factors that ‘advanced’ instruction provide little, if any,  impact.  Getting good sleep, eating right and giving kids time to grow physically are what young players need (along with us adults staying positive with them and giving them the moral support they need to maintain a desire to keep playing the game).

What a 12U ballplayer really needs to improve their skills is repetition of fundamental movements and disciplined oversight to ensure they are executing and repeating those movements correctly.  What they don’t need is a lot of information clouding their brains and causing confusion.

Advanced Skill Comes From Repetition

The daily repetition of fundamental movements does not end after age 12.  It continues all the way through a Major League career.  Go watch a High School, College or Pro workout and you will find the players working on the same basic skills we work on with our kids. There might be a guy with fancy sunglasses on the bill of his cap and a windbreaker with a cool logo standing next to the player, but the talk between him and the player isn’t that complex - really, that is the truth.

And the components of the actions used in the game aren’t nearly as detailed as some of us instructors and broadcasters tend to make them out to be.  These skills pretty much break down to ‘A, B, C’.  The key is proper and disciplined repetition of the movements making up the skills.  Ensuring this happens is where the coach/instructors job comes into play.  A former elite athlete or baseball guru is not needed for a child to greatly improve.  What is needed is a coach or instructor and can connect with a young player and gain their trust and respect, so the player will listen to and apply the feedback they are given.  Consistent and solid oversight of a player’s work, along with simple and clear feedback, is what constitutes ‘advanced’ (and quality) instruction.

Non-baseball examples of how something that looks complex, but is just a combination of fundamental movements are found in dance, gymnastics, figure skating, etc.  The combinations of movements of these athletes look complex and ‘advanced’ when in fact these athletes are simply stringing together movements that are fundamental to their sport.

If, as a parent, you want ‘advanced’ instruction for your child, find an environment where they get coaching that is kept simple and easy to digest.  You want an environment where disciplined repetition of quality fundamental movements is a central component of the activities.  Involve them with people who provide that instruction in simple terms and maintain clarity and simplicity when supporting the instruction. 

Hopefully such an environment will lead to your child continuing in the game past age 12.  If they are still playing at 14 or 15, at that point, there may be a need for them to get some ‘advanced’ instruction. 

Check Out the Coaching Guide

Practice Time Is Team Time …what are reasonable expectations for individual instruction from a youth coach?

Softball Team Pic.png

As parents, it important that we recognize that Team practices are just that …for training the Team.  If a player needs extra work in developing specific skills, that takes place before practice, after practice or outside the team practice environment.


Coaches are Volunteers

We must remember that our coaches are moms and dads, just like us, who are volunteering their time to give our kids a chance to play. Our coaches are not professionals. Just keeping a dozen kids coordinated, busy and having fun throughout a 90-minute practice is a challenge.

Asking a volunteer coach, right before practice, in an email, etc., “Could you spend a few minutes during practice working with Tyson on pitching”, may not seem like much.  When a coach works individually with one player, they are in effect turning their back on 11 other players (kids of 11 sets of other parents).  Also, during this time, the coaching staff is likely cut by a third or a half.    

It is perfectly reasonable to ask a coach if they could make time to give a player extra help.  When we ask a coach if they could show up 10 minutes early or stay 10 minutes after a practice, they will appreciate you recognizing that their time during practice is focused on the team.


Individual Skills Are Developed Outside of Team Practice Time

Next, suggest to the coach that you observe while they are working with your child, so you can take work with your child after that time so generously provided by the coach.  It is important to understand that no coach has a magic wand and the power to instantly fix a player.  The individual instruction a player receives is only step one (this includes time spent with a private instructor).  The important part of improving skills is taking the instruction and practicing what was taught, following the one-on-one time. 

The role of a coach is to serve as a guide.  Individual skill development is the responsibility of the player (and their parents).  Look at successful athletes at all levels of sports.  What one thing to they have in common?  They work tirelessly on their skill development outside of team practice time. 


Helping Our Kids Get Better

We all want our kids to improve. The best way to do that is to attend practice(s) and make some mental notes on key teaching points.  Then spend time with your child outside of the Team practice helping them develop their Individual skills.  This also gives us an opportunity to spend time with our child in a positive and constructive activity.


COACHES, YOUR INPUT ON THIS SUBJECT IS VERY VALUABLE.  Please share comments on the subject. Tell a story of parents asking for help in a thoughtful manner or when requests for help have not taken a coach’s responsibility (and time) to the team into consideration.


Instructional Scrimmage …a win-win activity for every practice

You are coaching a youth baseball or softball team and wrap up another game with more mistakes than expected.  You’ve done a good job getting your team ready and practices have run well, but the team’s efforts are not translating to games.  What could be missing in your preparation?


Great Practices, Poor Game Results

Many youth baseball and softball coaches run solid practices, do a great job teaching skills and taking their kids through drills, but don’t see that effort in practice translate to game success.  One aspect of practice that many coaches leave out is practicing playing the game.

Failing to include a Scrimmage as part of a practice plan may be the missing link in a team’s formula for success in games.

The first reaction to the idea of including a scrimmage in practice is that it is not a productive use of time; ‘the kids are just playing around and not getting better’.   That can be true if the scrimmage does not have a clear objective and is not structured properly.  On the other hand, if a scrimmage is structured and managed as a teaching tool, it can be the activity that ties everything together.


Three Benefits of Scrimmaging Each Practice

Kids sign up to PLAY

Kids understand the need to practice, but we cannot lose site of the fact that playing is what they really want to do. There is a perspective that drills need to be competitive to keep kids engaged.  Often, when adding this element into a drill it detracts from the objective of develop the good actions needed to execute a skill.  The kids become focused on winning the drill.  Ending each practice with a scrimmage feeds the desire for competition.

Discipline

Knowing that practice will conclude with a scrimmage helps with discipline in drills and other practice activities.  Players are more motivated to follow directions and move quickly between drills.  If they slog around, they know they are cutting into their scrimmage time.  This may draw out leadership from players who encourage their teammates to keep things moving during drills and transitions between practice activities.

Translate Skills to Game Speed

Actual game situations can vary quite a bit from a structured drill environment.  The combination of the placement of the ball off the bat and the speed and location of the runners is unique most every play.  Kids master drills and skills in practice, but if they are not experienced in applying those to the unique situations and pace of a game they are not as prepared as they could be.


Reps Coordinating as a Unit on Defense

Drills break the game down into smaller segments.  Scrimmage creates an environment for the defense to work as a unit.  Coaches can identify breakdowns.  Areas in need of more work are identified before game day.

At the youth level broken plays occur often.  When these circumstances come up in a scrimmage, players learn to regroup on the fly and bring the play under control.  Early in the season players will be slow to cover a base, be in position to back up throws and get into position to execute a relay. 

In the scrimmage format outlined below, we maintain a fast pace that engages all nine defensive players throughout the activity.  On each play there will be mistakes, corrections are made and learning within the context of the game takes place. 

Our feedback during scrimmage is not limited to correcting and teaching.  On each play we can also acknowledge the kids doing things well.  When we point out what our kids are doing right, no matter how basic, we build their confidence. 

Specifics regarding feedback during a scrimmage are covered in detail following the next section.


Scrimmage Structure

Nine on Defense, One batter, Two Base Runners 

Players do not sit out waiting their turn to bat.  Extra offensive players are on the bases getting base running experience.  Including base runners on each play also increases decision making for defensive players.  Making decisions at game speed is a big part of learning how to play the game. 

Players Do Not Pitch

Scrimmage is not the place for developing pitching skills.  A coach pitches from 20’-30’ (we still have a player at the rubber fulfilling the defensive responsibilities of the pitcher).   The closer the coach-pitcher, the higher the percentage of hitable pitches.  I urge coaches to pitch from a knee (instructional video: watch 0:40 - 1:20 for Baseball; 1:20 - 2:10 for Softball). 

A key to maximizing scrimmage time is a providing a high percentage of strikes and limiting the amount of time between the end of a play and the next batter putting the ball into play.  At the conclusion of a play our players quickly get back to their positions, receive brief feedback and then the coach pitches to the next batter. 

Positions on Defense

Early in the season we give players reps at a lot of different positions during scrimmage.  My philosophy is for kids to get experience at as many positions at possible.  But as the season progresses we need to be mindful of getting players reps at the positions they’ll most likely be playing on game day.

Assistant Coaches Are on The Field

Position one coach between the third baseman and left fielder. They communicate with those two positions as well as the shortstop.  A second coach stands between the first baseman and right fielder focusing on the three players that side of the field.  If an additional coach is available, put them in the area behind second base.  Their focus is on coordinated play of the middle infielders.  Also, to make sure the center fielder is engaged in each play. (see defensive responsibilities)  

The coach doing the pitching (usually the head coach) focus their feedback on the pitcher, catcher, and batter.  Comments to the batter should be limited to simple reminders of what has already been taught and trained i.e., ‘turn fast’, ‘head in place’, ‘balance’, etc.  Scrimmage is not the place for detailed batting instruction. 

In our first few scrimmages we let many mistakes go because not much content has been taught.  As the season progresses, and the kids are exposed to more information, our feedback during scrimmage covers more aspects of the game.

Use a Tee (sometimes)

The objective of scrimmage is to get the players massive game repetitions in a short period of time.  Using a tee helps achieve this goal.  A tee guarantees a strike 100% of the time.  This pace of scrimmage speeds up significantly.  We can change the relationship of the batter to the ball/contact point to have some control of where the ball is hit (pull, middle, opposite field).   

Most scrimmages have the coach pitching, but recognize the tee as an option.  When we are short on coaches, using a tee with a coach at home plate instead of pitching, with their back to the defense, they can keep their eyes on all the action.

Team development needs and which point of the season we are in dictates how much time is invested in scrimmage.  Early in the year scrimmage may be only 15-20 minutes, giving each player only 1-2 at-bats.  As the season progresses, scrimmage time can bump up to 30 minutes with each player batting multiple times. 


Make Scrimmage a Powerful Teaching Tool

Below are guidelines for setting up and running a productive instructional scrimmage.  This is not a complete list, but the fundamental aspects of play that a youth team wants to be executing by the latter parts of their season.

Rules for Teaching

  • Only correct what has been taught and drilled in practice

  • Be on the lookout for things the kids do correctly and acknowledge their accomplishments.

  • Keep comments directed towards actions, not results

Focus Points for Teaching

The teaching and reinforcement that your coaching staff is concerned with depends on the age of your kids, their level of play and the amount of content that has been taught and drilled in your practice sessions.

Addressing Common Physical Mistakes

Errors and other physical mistakes are going to happen often. Kids know when they have missed a ground ball or made a poor throw. We want to help our players learn from their mistakes, so how do we address them? Use action focused talk when giving feedback. Examples:

  • Keep your feet moving through the fielding action

  • When you drop step, the throwing hand foot goes back

  • See the ball before committing to the stretch position

Improve Team Defensive Play

Often in youth baseball games, when the ball is put in play, many of the players do not move.  Each player on defense has a role on every play and needs to be moving to fulfill their responsibilities (see defensive responsibilities).  Scrimmage exposes kids to this fact multiple times in a short period of time. 

From the time the ball is put into play until it is returned securely to the pitcher at the play’s conclusion, it is usually handled by 3 or 4 players and sometimes more.  At our level of play, managing the ball as it moves around the field is a challenge.  

Base runners add to the complexity of the defensive responsibilities.  In a game (and scrimmage) there are no do-overs, so the players are pressed to make decisions quickly while executing the physical requirements as well.


Coaching Points During Scrimmage

As with batting, scrimmage is not the place to spend time teaching fielding mechanics.  We do that during drills and before and following team practice time.  Our teaching focus is on coordinated team play.

Identify the Situation

  • Number of outs

  • Location of runners

  • Which bases a force out can be made

Movement

Dealing with Base Runners

Communication

Relays

  • Positioning of the cut-relay player

  • Communication between players involved in the play

  • Outfielders always Hit the Cut

  • Cut-relay player footwork: Move Feet to Catch, Move Feet to Throw

  • Recognizing when to not relay the ball (runners have stopped advancing or will clearly be safe)


More information is found on Scrimmage page of the website.